With DocuWare Printer, you can archive documents in seconds just by using the print menu of your ERP, CRM or Office program – including indexing! We'll show you how easy it is to set up this printer configuration.
Archiving by print command is especially useful for standardized documents that contain index information in the same places, such as outgoing quotes, invoices or purchase orders. Index terms can be read directly from a document and archiving is fully automated. To set up this function, all you need to do is install DocuWare desktop apps – which includes the printer – on your computer.
Contents:
- Creating a Printer Configuration
- Upload a sample document
- Pick a target storage location
- How documents are indexed when printing
- Trigger for configuration
- DocuWare Printer and go!
Creating a Printer Configuration
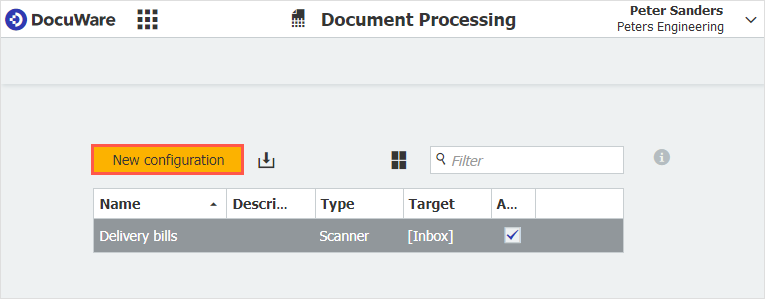
From your main menu, open DocuWare Configuration, go to Document Processing and click on New configuration.
Upload a sample document
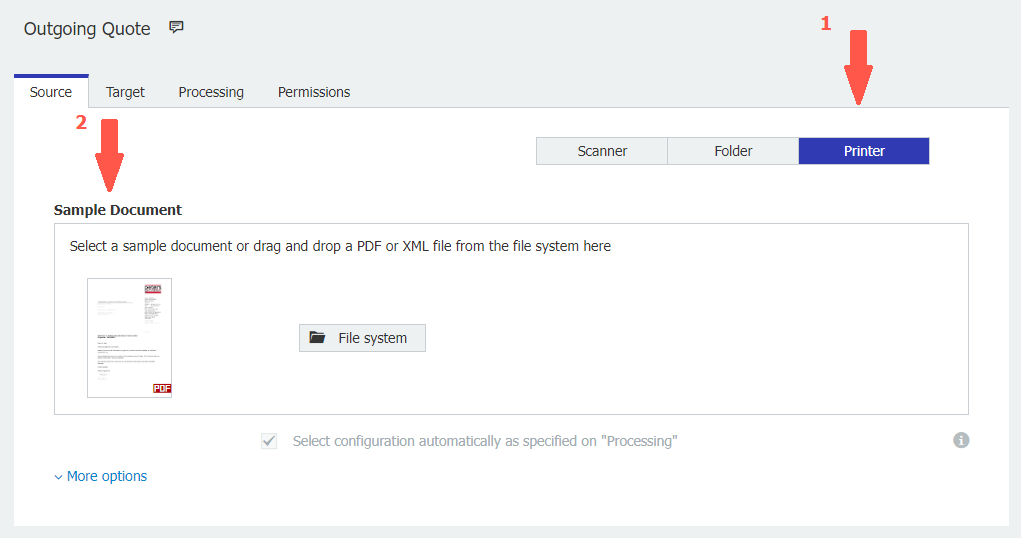
Name the configuration – in our example, it‘s called "Outgoing Quote".
On the Source tab, select Printer. Then upload a sample document. It serves as a model for the archiving criteria for your documents that will be applied by the print command.
Pick a target storage location
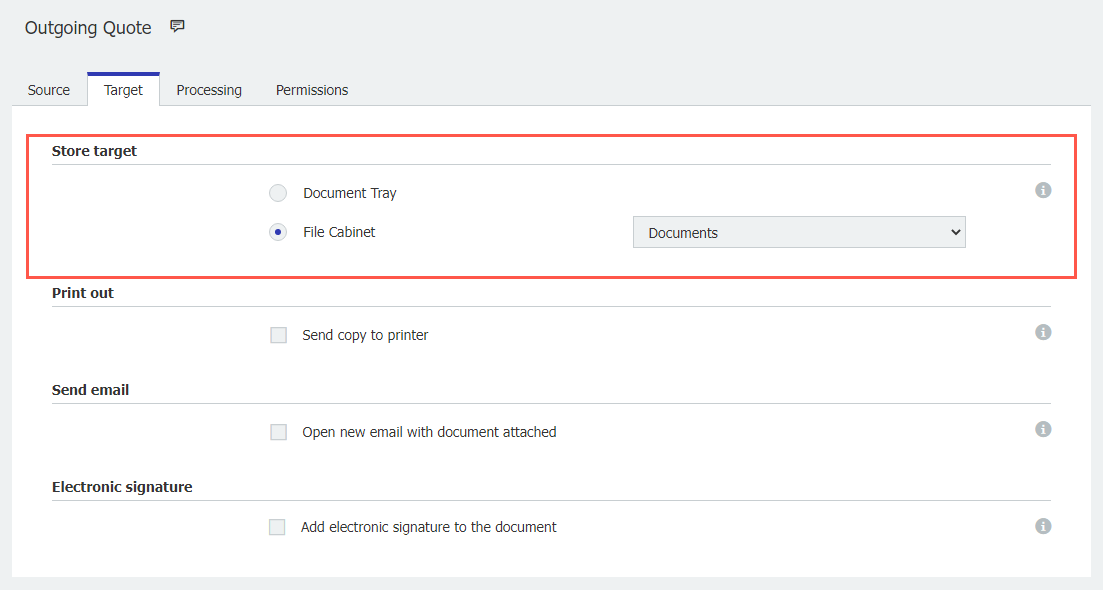
Under Target, you identify where – in which file cabinet – you’d like to store your documents. You can also adjust other settings, such as whether every document stored by print command should be sent by email somewhere else at the same time.
How documents are indexed when printing
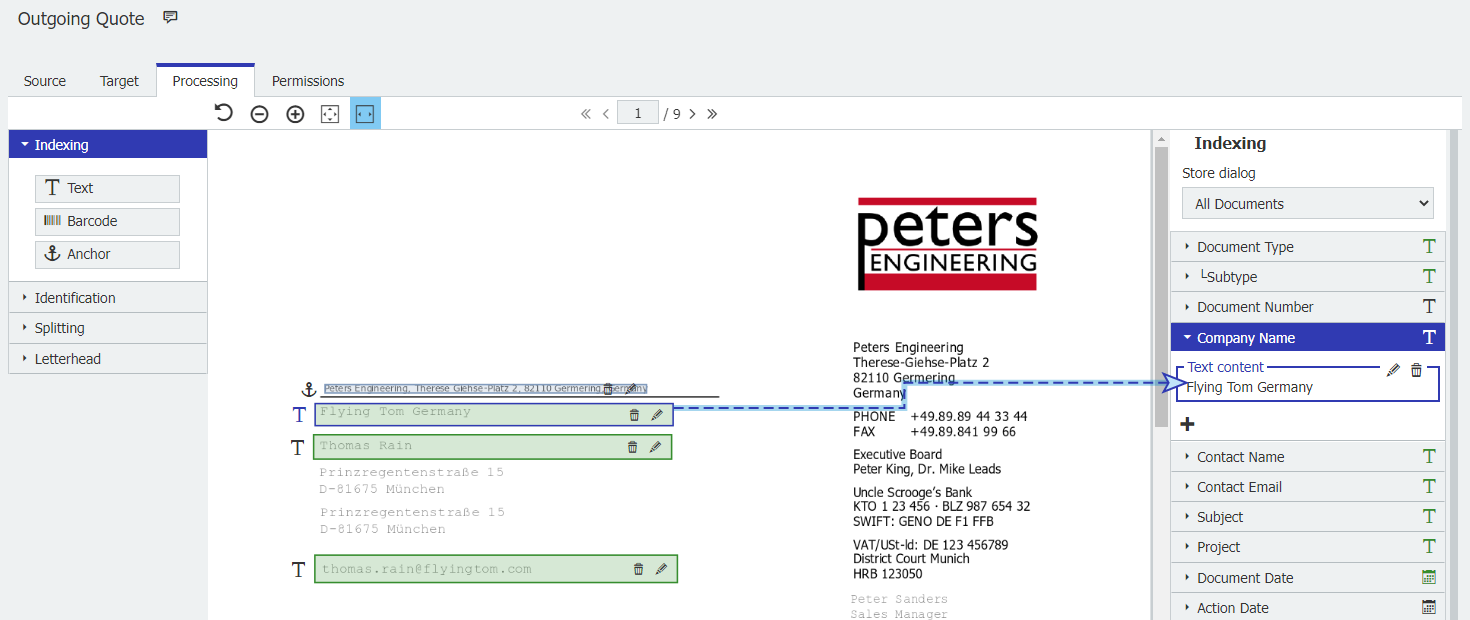
On the Processing tab, you specify which index values the documents will receive when they are stored in a file cabinet. To do this, you can define fixed values or readout ranges on the document. In the index fields on the right, you can include fixed entries, for example the document type Offer. Or you can have values or characters read from the document, such as a company name. To do this, click on the text field icon on the left. Then drag a frame and connect it to the index field with an arrow. In other words, you just mark the spots in the document from which the values will later be read.
Anchors help to make the configuration more dynamic. In our example, the company name is read relative to the anchor above it, i.e. the address field letterhead. In this way, the address block can be placed anywhere and can also be shifted compared to the sample document. Nevertheless, it is still recognized and read. DocuWare Printer searches for a specific text (in this case the address) and reads the defined elements relative to it.
Trigger for configuration
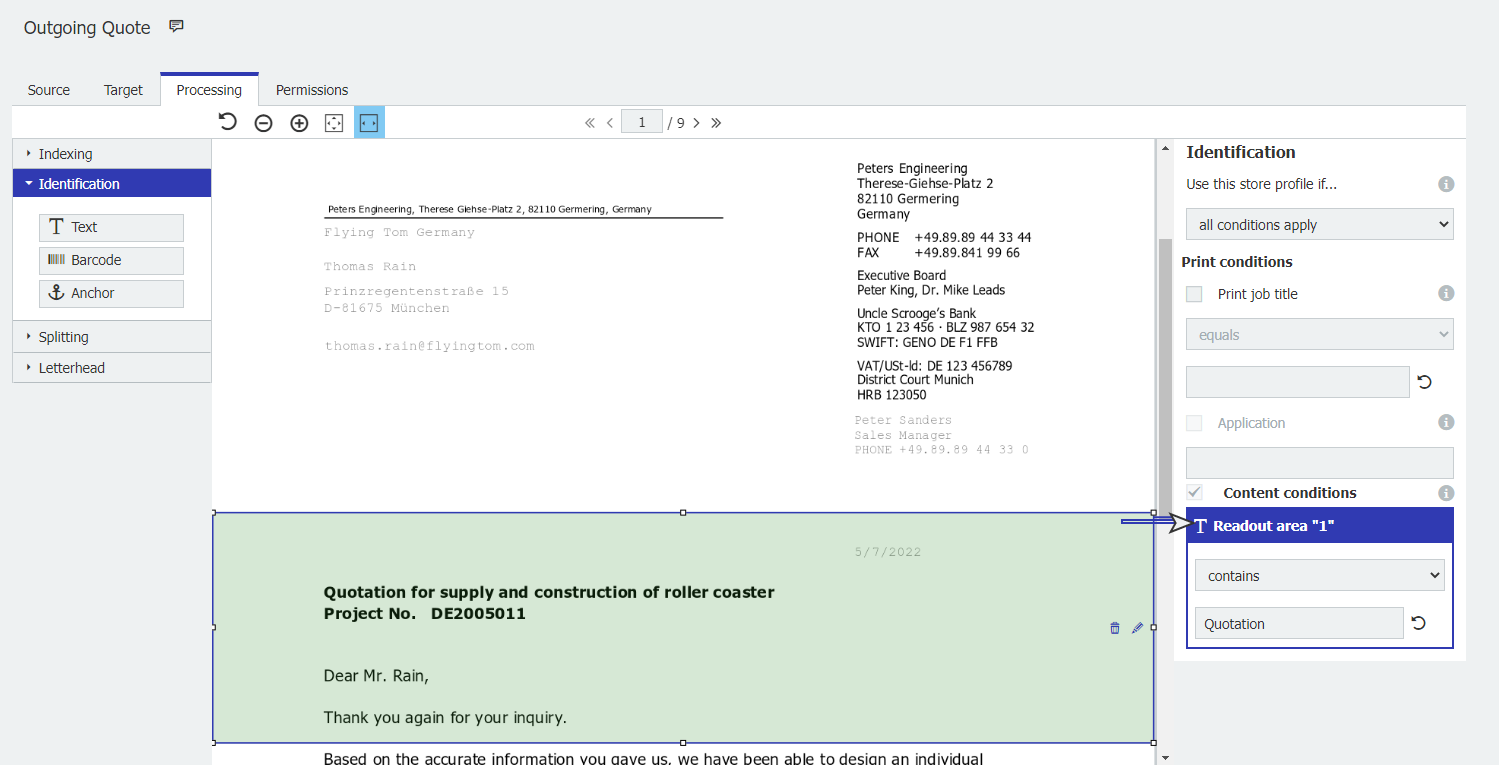
In the last step, you specify which content conditions must be met for the configuration to run, under Identification. In our example, this is when the word "offer" is found in the selected area. Of course, several fields and anchors can also be used here.
Finally, if you are creating the configuration for someone else, assign it to them under Permissions. All done!
DocuWare Printer and go!
As soon as you create a document like this in Office or your ERP, you can store and index it directly from the print menu in DocuWare. If you have created several printer configurations, let’s say for offers and one for contracts, your program will automatically "know" where these documents are stored and how they should be indexed.
One last hot tip: You can instantly retrieve the right document from DocuWare right out of your other applications by using keyboard shortcuts with Highlight Search, which is a kind of flash search.

