Stamps in DocuWare can do much more than their analog predecessors: they can be switched on and off, used to control processes, and can even serve as signatures. Best of all, they can be created in no time and (if desired) utilized by many colleagues.
Requirement
With standard settings, every DocuWare user can set up stamps for their own use – for example, with a scanned signature. If you want to make stamps accessible to colleagues, you need to have the right for Configuring Stamps (DocuWare Configuration > User Administration).
Let's get started
Open DocuWare Configuration via the DocuWare main menu and click on the stamp icon in the Collaboration section. The New stamp button asks you to pick between a text stamp or image stamp. As the name suggests, the latter contains an image, such as the company logo, a scanned signature, or simply a small graphic. PNG, JPG and GIF are supported as formats. A text stamp can contain different types of texts: fixed text, text entry fields and fields with predefined select lists. Both stamp types can be supplemented by date, time and user name, i.e. information showing when and by whom a stamp was set.
Image stamp
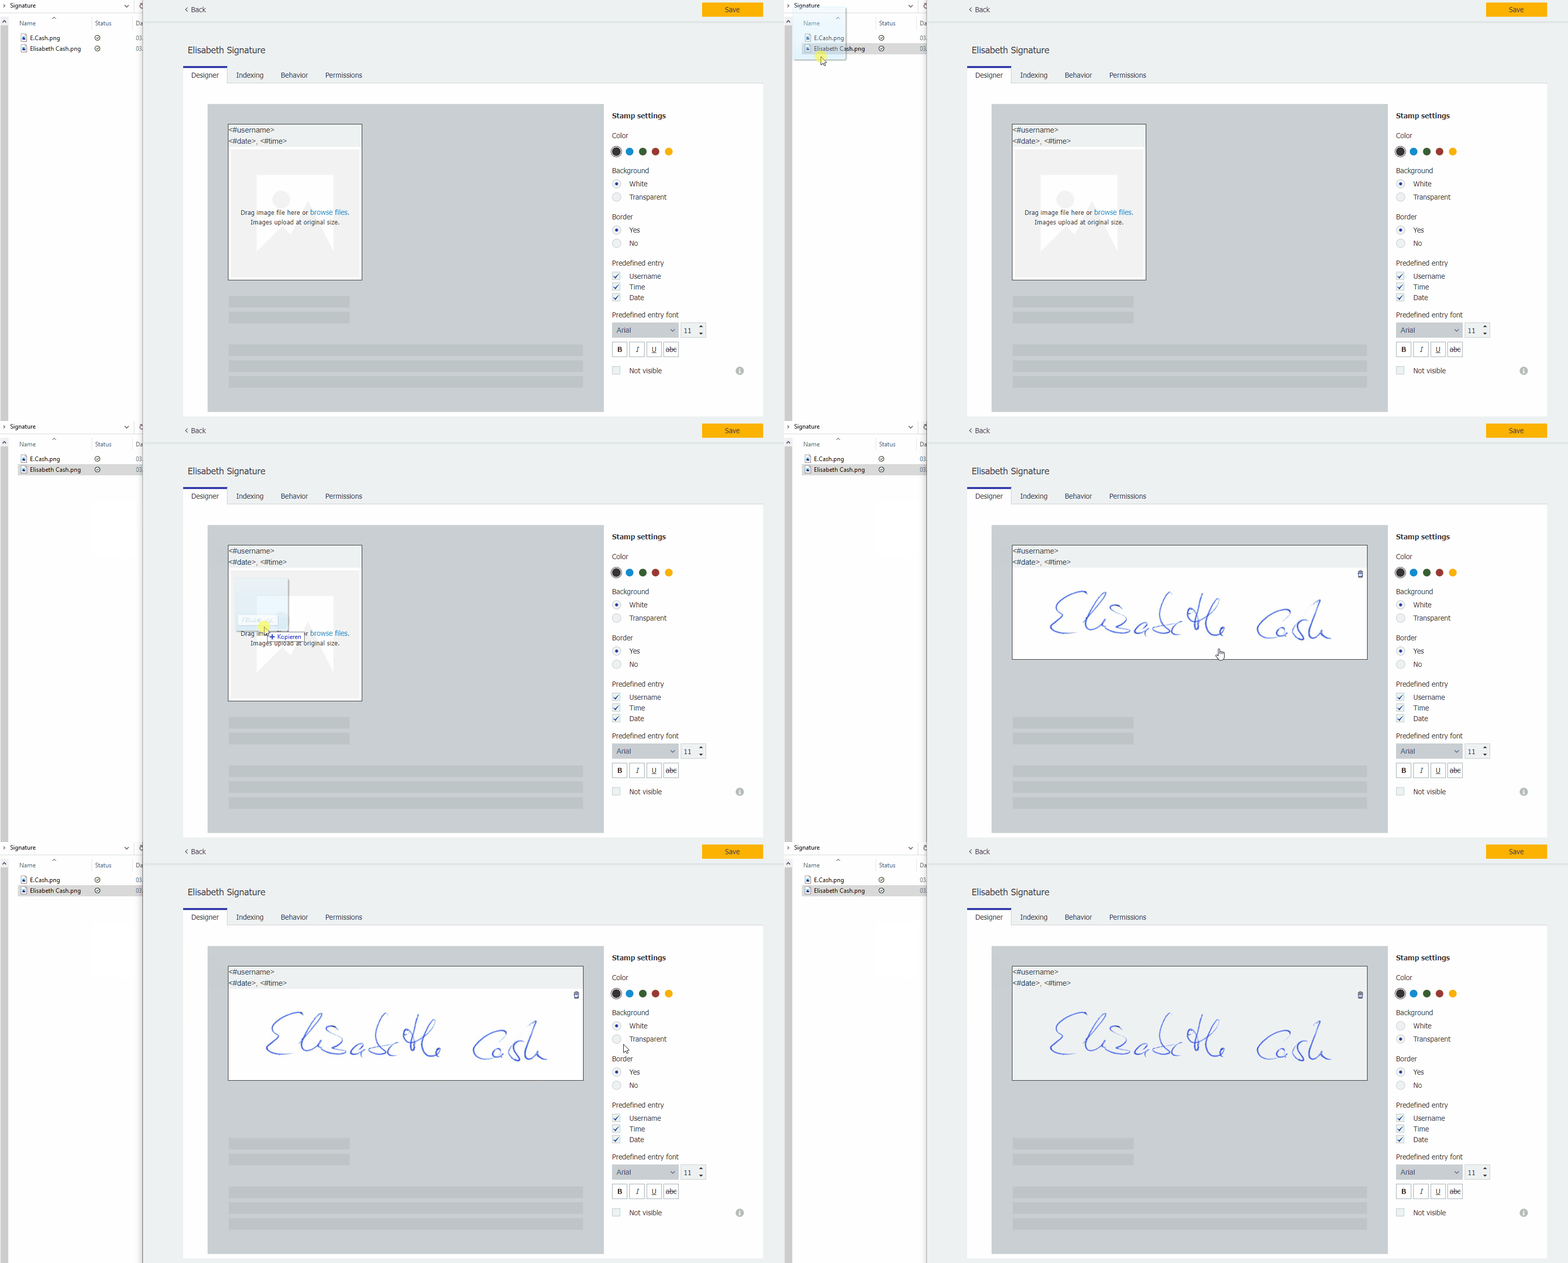
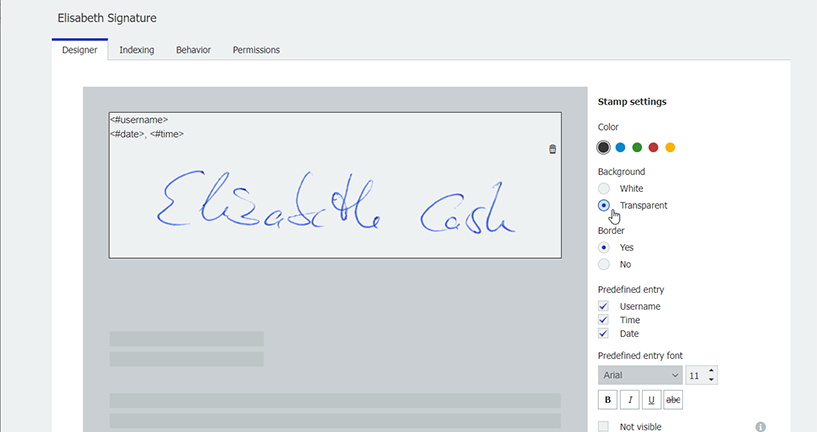
You can simply insert the image file into the configuration via drag & drop. The Transparent option removes the background so that the white area of the stamp does not cover the document later.

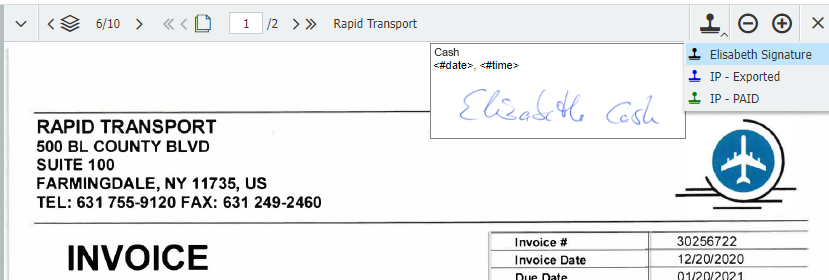
If you don't want the stamp to change the indexing and will only be used by you, then you're done. Just save the configuration and reload the Web Client in the browser (browser Refresh or F5) and your stamp is ready for use in the viewer:

A small legal note:
This type of signature stamp is considered a simple signature. If you require advanced or qualified signatures, please use the DocuWare Signature Service.
Text stamp
As mentioned above, a text stamp can contain several types of text:
- Fixed text: Simply tap this in the designer field. In the right area Primary stamp font, you can define the font and size.
- Text entry field: Click Add User Input, label the field, and select Text as the field type. If necessary, you can select a field mask for IBAN or similar.
- Entry from select list: Start with Add user input and give the field a label. For the field type, it’s best to choose select list and select one from your system.
What the user enters or selects when setting the stamp can be used for indexing the document. This brings us to the next step of the configuration.
Indexing
The settings here are particularly important for stamps that will help guide documents through processes.
Example:
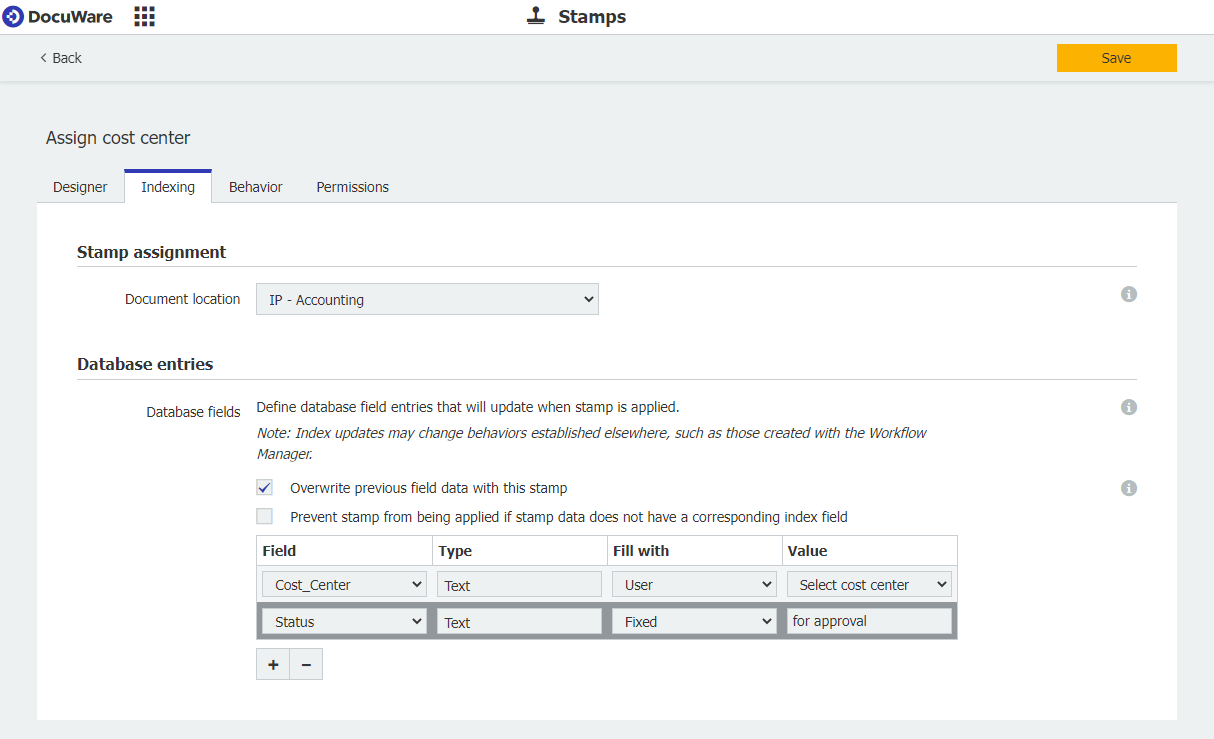
To assign invoices to the relevant cost center manager, you can use a stamp with a stored select list. When setting the stamp, the user must pick the corresponding cost center from the list. The value is then written into the corresponding index field and the invoice immediately appears in a list of the cost center manager for further processing. In addition, the status of the invoice should be changed.

To configure indexing, first select the file cabinet, then the associated index fields. In this case, the index field 'Cost Center' is to be filled by the user from the stamp’s select list; the fixed value 'for approval” is entered into the index field 'Status.'
Behavior
In this step, you specify, for example, whether the document is closed after stamping and whether the stamp is to be used as a signature. For more information about the possibilities, see the article Stamps: Right settings for even easier use.
Permissions
As with other DocuWare configurations, you can assign stamps to users directly or via profiles. Password protection is offered as an additional security option. When setting the stamp, the user must then enter the DocuWare password. If you work with single sign-on to log into DocuWare, please keep in mind that users may not know their DocuWare password.
More about DocuWare stamps:
- Blog article: Hide and show stamps on document
- Blog article: Stamping with a fixed select list for error-free indexing
- Knowledge Center Help: Configuring stamps


