When you apply a stamp you can also change the index values of the stamped document. To do this, use a fixed select list to limit new index entries. Especially when entering numerical sequences like cost centers, it’s a great way to avoid typing errors.
Typing errors are particularly troublesome when index entries are used for automatic document processing; for example, in a workflow or for transferring data to accounting software via Autoindex. These processes stall and you have to waste time hunting down an error and making a correction.
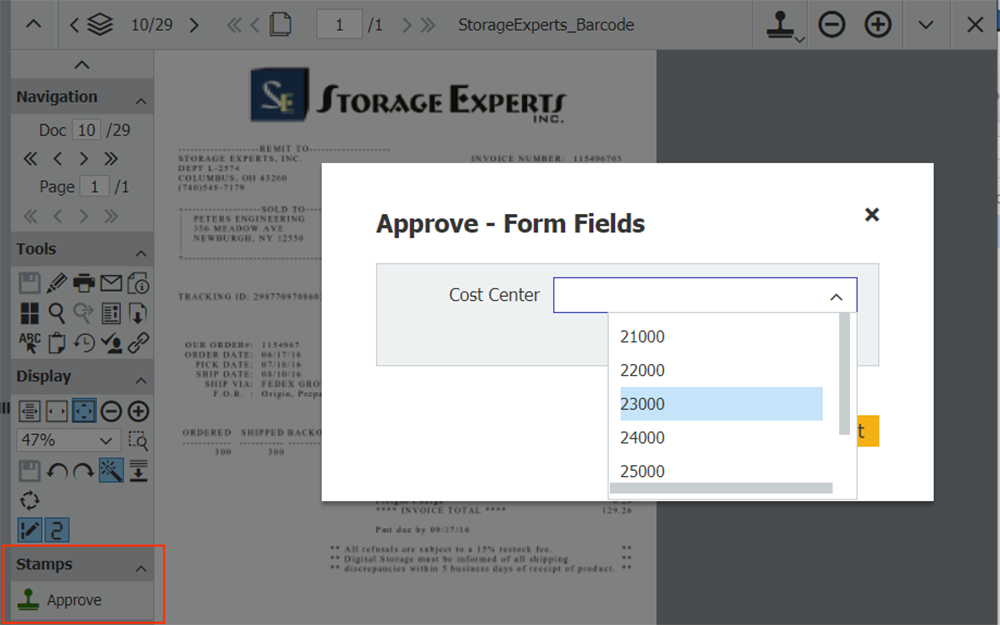
So let's say you frequently need to have invoices approved by various teams in different cost centers. To simplify this process, you just create a select list (Step 1) and a release stamp (Steps 2 and 3) and link this selection list to the stamp (Steps 4 to 7).
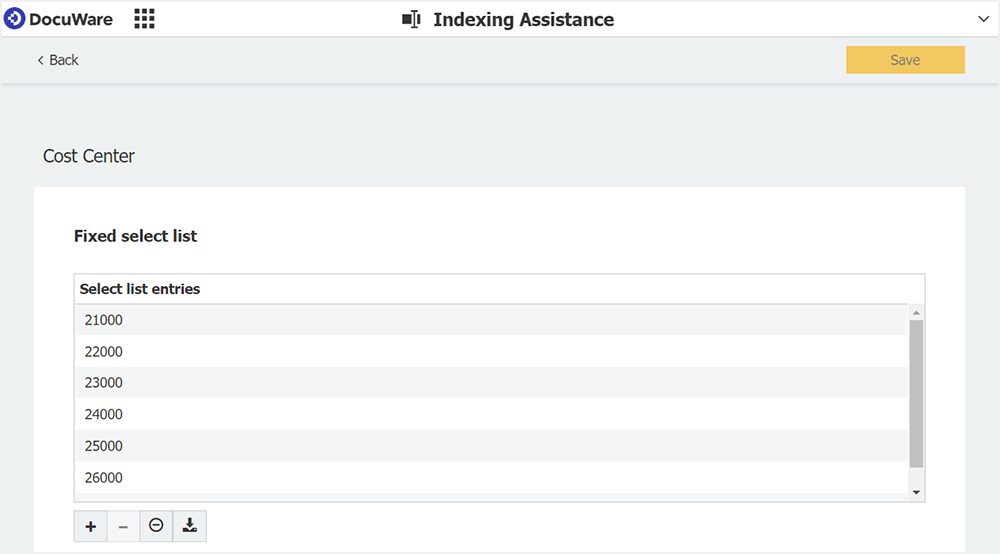
- Create a fixed select list containing your cost centers – if there isn’t already one available. This can be done within DocuWare Configuration under Index > Indexing Assistance. Click the New select list button, type in the numbers and Save.
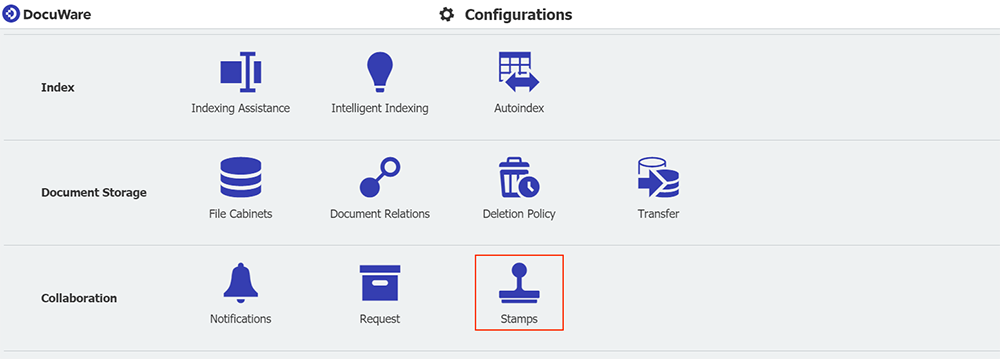
- Stay in DocuWare Configuration and switch to Collaboration > Stamps and create a text stamp.
- Define stamp settings: The name and the color appear in the Web Client where the stamp is used (1). Font settings can also be adjusted here.
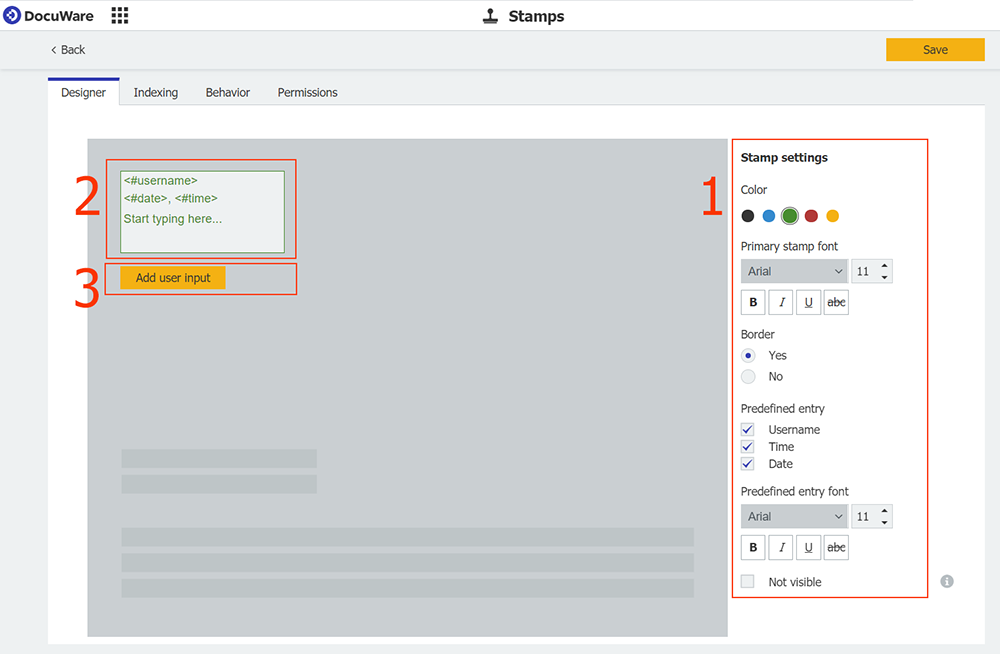
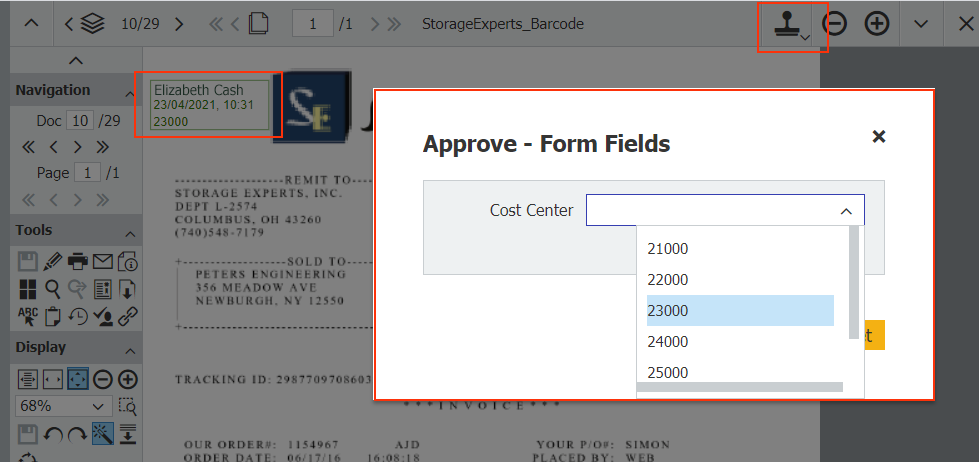
Username, date and stamp are added by default to the stamp (2). This is especially useful for colleagues to see who placed a stamp on a document and when. But you can also change this if necessary. -
To assign the select list to this stamp, click the button Add user input (3) in stamp settings.Choose Select List as field type and add the cost center select list you already created in step 1.
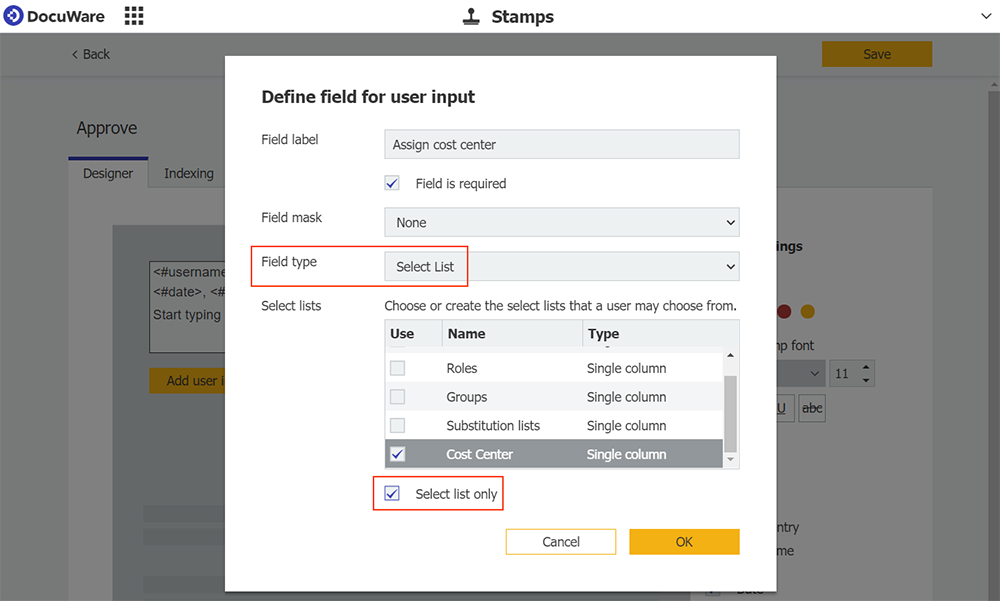
To make sure that only values of the select list can be applied with this stamp, check the option Select list only. -
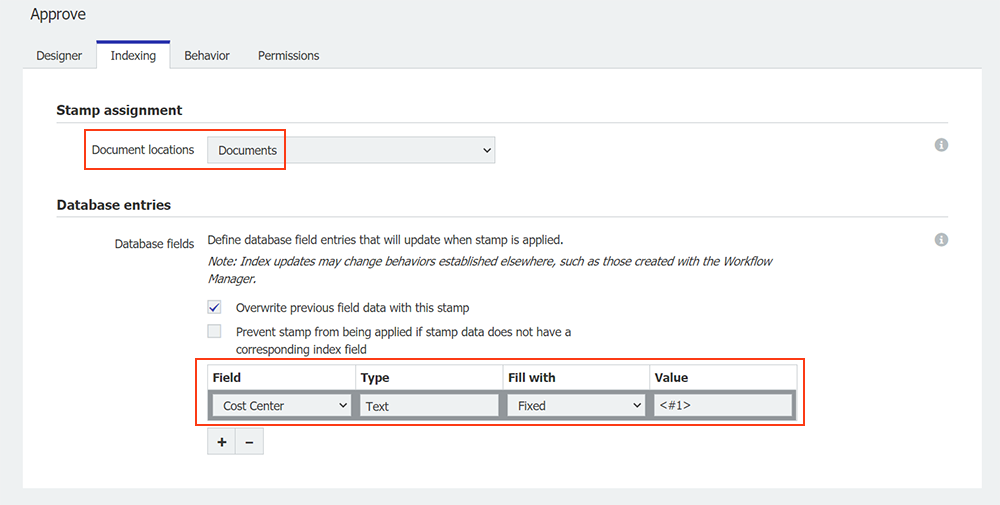
Define the file cabinet where the stamp is applied. You can also make the stamp available in all file cabinets and document trays. In our example, the stamp is available for documents specifically stored in the file cabinet “Documents.”Choose which of the document’s index fields should be filled or altered when the stamp is added. All fields of the chosen file cabinet are available here. In this example, the "Cost Center" field has to be filled with the number of a cost center.For Fill with, enter Fixed. For Value, the prompt “entry like” is shown. This allows the user add a cost center select list into the index field.
- In the Behavior tab you can leave the default settings.
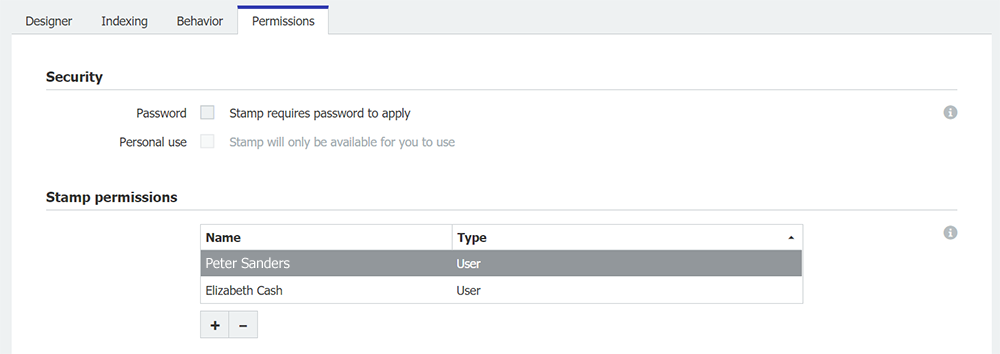
- Under permissions, make the stamp available to any colleague you want using it.
If an employee uses the Approve-stamp in Web Client, all cost centers may be picked from the select list.