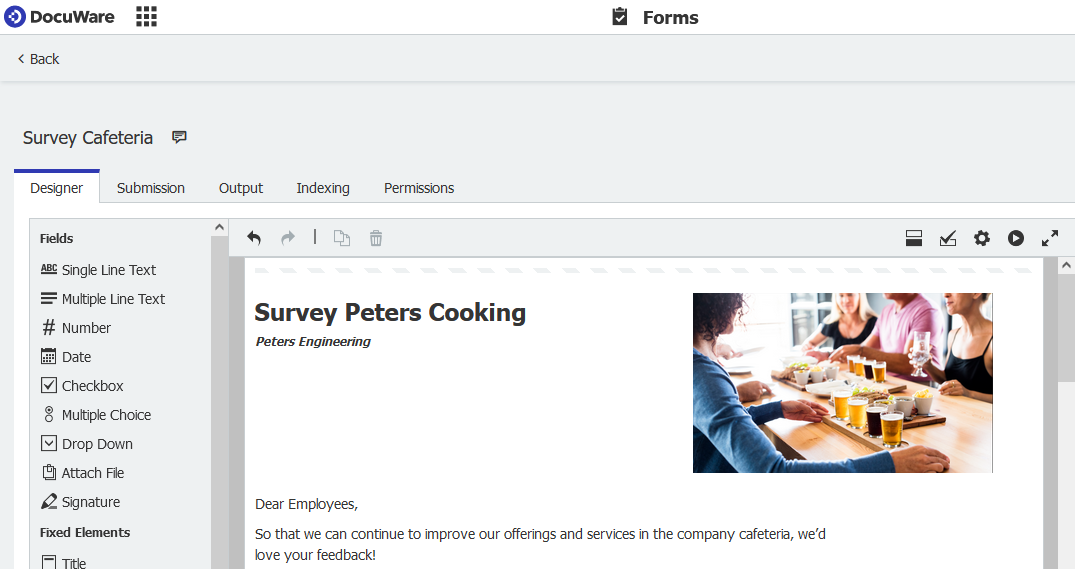
Surveys of employees and customers provide important insights to make the right decisions. Thankfully, they are also quickly created with DocuWare!
Last month, you got some tips on how to design a survey form. In this second part of the series, we’ll show you how to implement them with DocuWare.
Create a new form
To create a survey form, you need DocuWare Forms - which is included as a feature for DocuWare Cloud customers. So when you are clear about the goal, structure and phrasing of the survey you want to create, head to DocuWare Configuration via the main menu in the DocuWare Client.
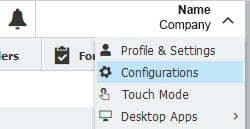
Create a new form in the Forms area:

Set description and title
Give the form a description for you to use internally. To do this, fill in the field for the description in the upper left corner of the designer. This description, for example, will then be seen as an entry in a list of existing forms in DocuWare Client.
With a new DocuWare form, a pre-formatted title is available by default. All you have to do is enter a name and, if desired, a subtitle.
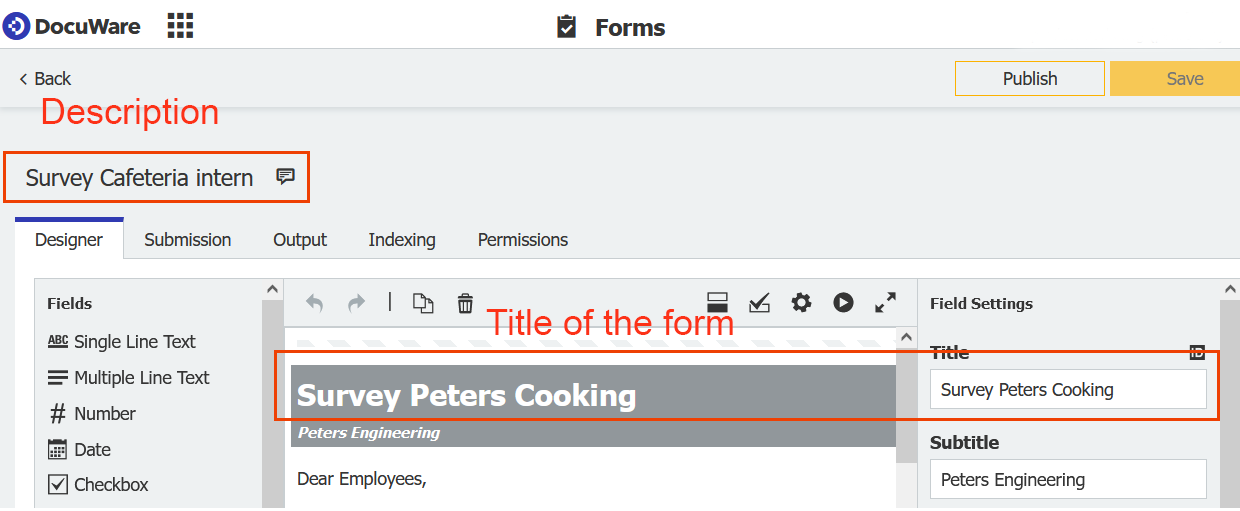
Note the difference between title and description. The "title" is displayed in the form, while the "description" can only be seen internally – for example, as an entry in the form list in the DocuWare Client.
Fixed text field for the introduction, general information etc.
Only the fields for fixed text can be formatted in color, etc. Use one for the introduction. Drag a field from the list on the left to the center. Settings and entries are then done on the right side of the form preview.
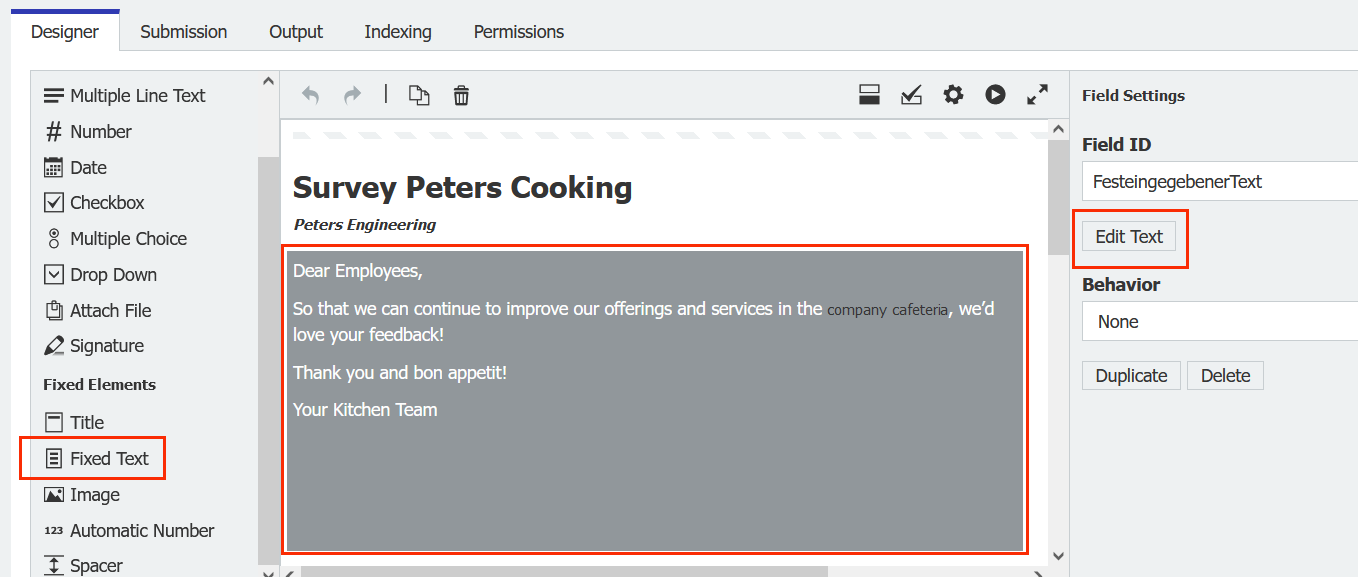
In the text editor in field settings on the right, you can adjust font size, color or embed links among other things.
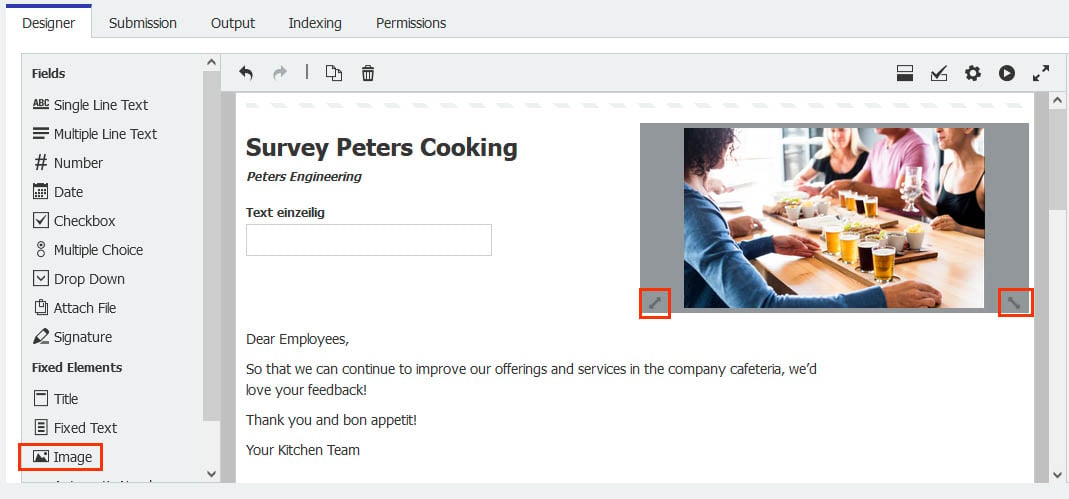
You can also insert an image like a text box: you simply drag the field for an image to the center. With Browse you select an image from your computer. Then drag or slide the field for the image to the desired width using the "handles."
Drop down, multiple choice and checkbox - the right option for every query
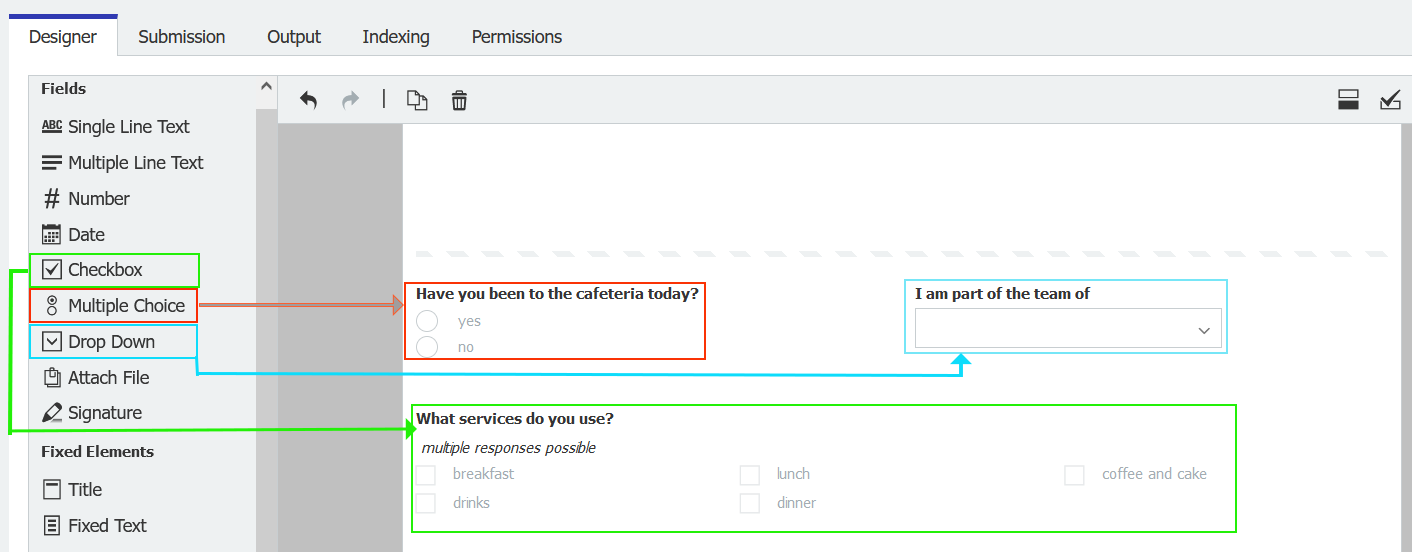
Now you’re ready to create the questionnaire. Each field consists of a question with answer options. You can choose between the following field types:
- Drop Down: With a drop down or list box, only one answer is possible. Answer options are displayed as a list where one option can be clicked. Best suited for questions with a lot of answer options.
- Multiple choice: Only one answer is possible, all answer options are displayed. This type of question, for example, is well suited for yes/no answers.
- Checkbox: Several answers are possible for this question type and all answer options are displayed.
A layout tip: Arrange the multiple choice and checkbox answer options side by side so that the form doesn't get too long. Up to ten columns are possible.

Multi-line text field for open questions
Use the multi-line text box for open questions. Drag the field wide enough so that respondents have enough space for their answer.

New questions that line up with previous answers
This means that you only show questions that are relevant to the respondent. In our example, the question "How do you find the lunch?" will only be shown if respondents selected for lunch in a previous question about how they use the cafeteria.
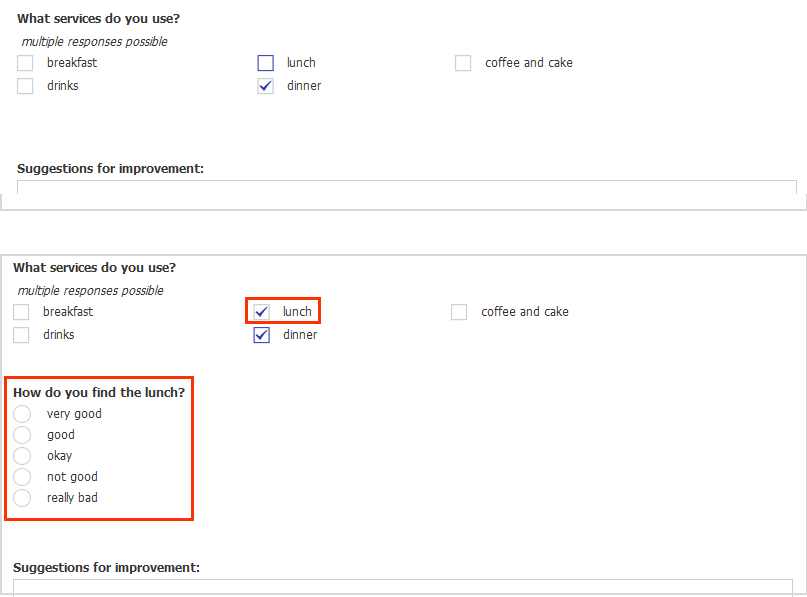
In the picture above the option "lunch" is not selected, so the question about lunch is not shown.
To configure this, click the field that you want to behave this way – and then click Field Behavior.
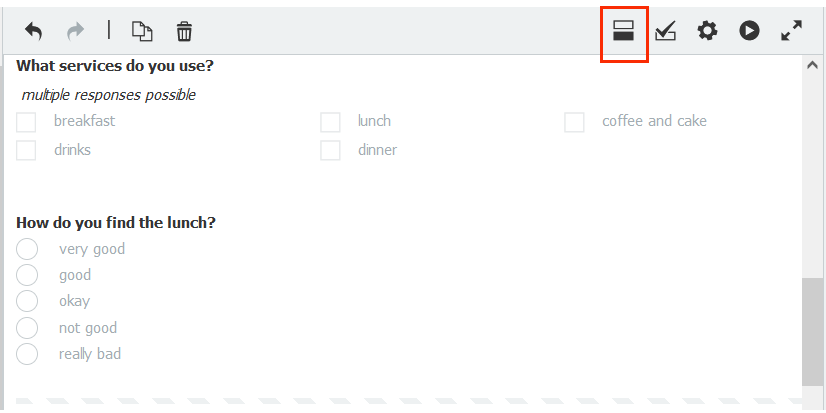
In the next dialog, formulate the condition that the field How do you find the lunch is displayed: Here it is "If the field What services do you use does not receive the answer lunch, then hide the field How do you find the lunch.
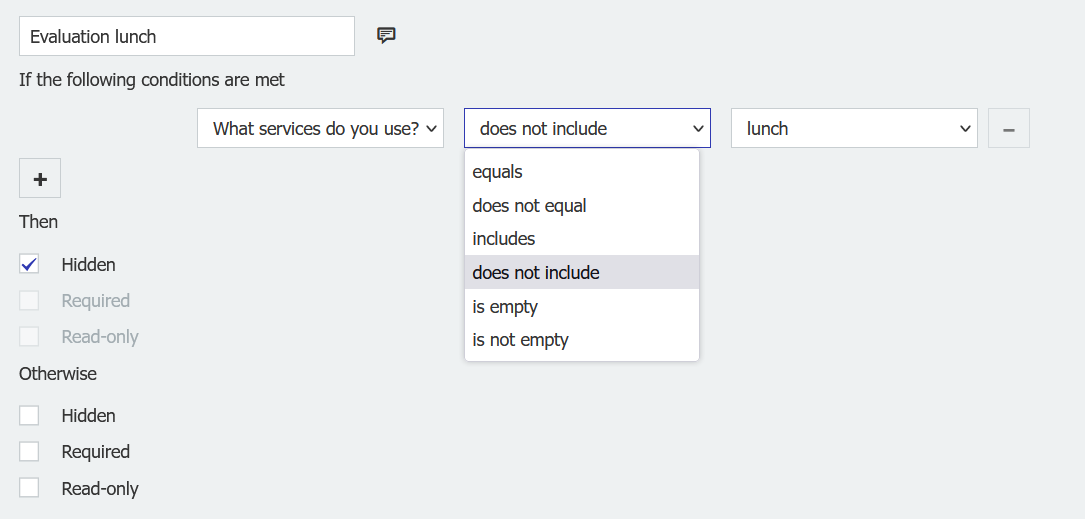
Conversely, this means: Show the field when lunch is selected, along with other options.
Add a thank you
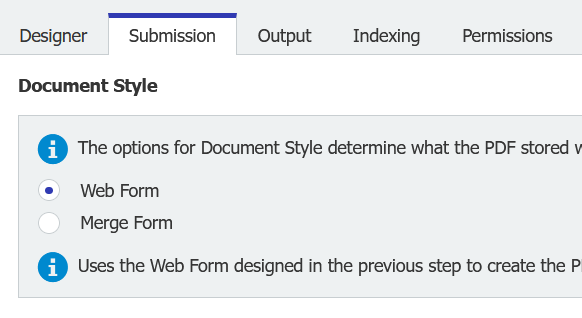
When you've finished the questionnaire, go to the Submission tab. Set the Document Style to Web Form so that the completed forms are submitted and saved in the simple design of a Web form.
Show your appreciation for the customer or employee who participated in the survey by displaying a short thank you line after submitting the form. You can also include a link to a special offer, etc.
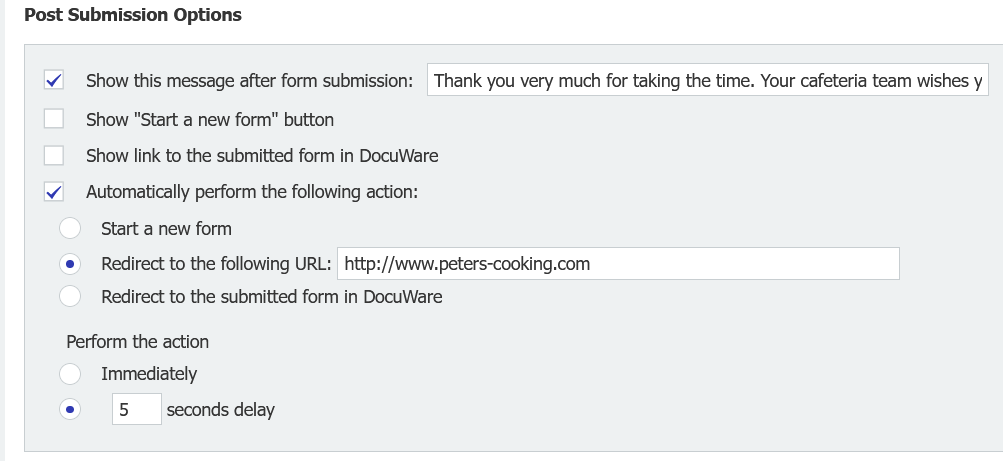
Tip: Click the option "Display: 5 seconds" to give the recipient the necessary time to read 😉 your message.
You’ve now designed and configured an online survey form!
This article is the second in a serie about realizing online surveys with DocuWare Forms. Read also the other articles of the serie:
Part 1: 10 Tips: Creating the best online surveys
Part 3: Online surveys using DocuWare forms: Options for analyzing responses
Part 4: Send out survey forms – even to external users
Also interesting:
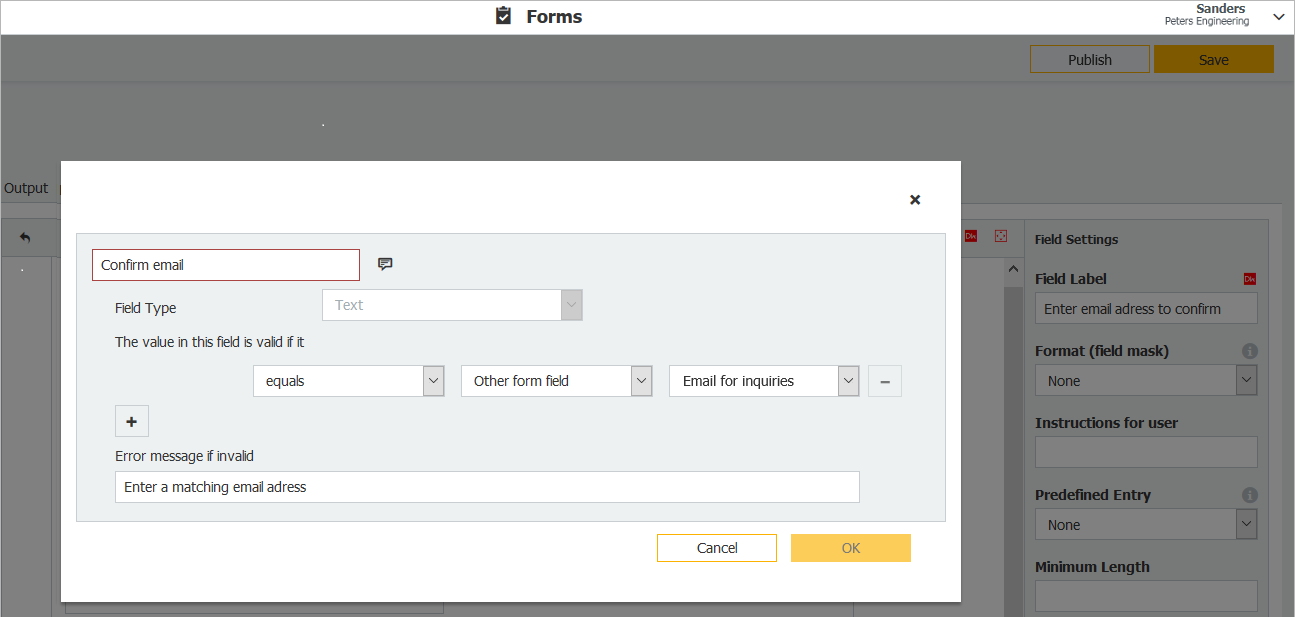 |
DocuWare Forms Flags Incorrect Entries Nothing is more annoying than incorrect or incomplete data entries in forms. Teach your forms to make the right entries themselves. This makes sure that only the very best data is stored in your archive.
|
 |
Enhancing Forms Automatically in Workflows For some processes, not all information is available from the very beginning. No problem – set up a workflow with a form and automatically fill in the empty fields later.
|

