


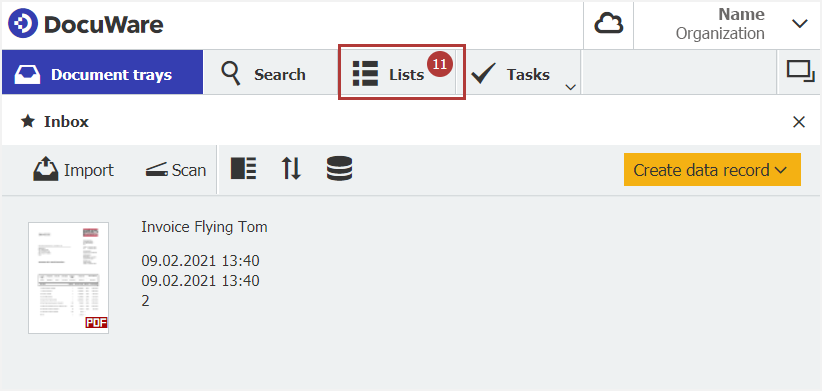
DocuWare lists reliably display documents that need to be processed day in and day out. These lists help employees plow through their all tasks in a timely manner. But how do documents actually find their way into a Web Client list? And back off again?
How do documents get automatically displayed in the list area…without having to search for them yourself? Quite simply: working behind the scenes, the “Rules Editor” is on it!
For example, let’s say you are a sales manager who wants to put together an overview of all new incoming invoices related to your team. To configure this list, you go to the File Cabinets area in DocuWare Configuration, open the desired file cabinet and create a new List. For this, you‘ll need the specific function right to Configure file cabinets and the administration rights for a file cabinet. (If you have any questions about this, contact your DocuWare Administrator about assigned rights.)
Query fully compliant with rules
Is the Rules editor option checked? Good! Because the rules are what directs the documents into the Web Client.
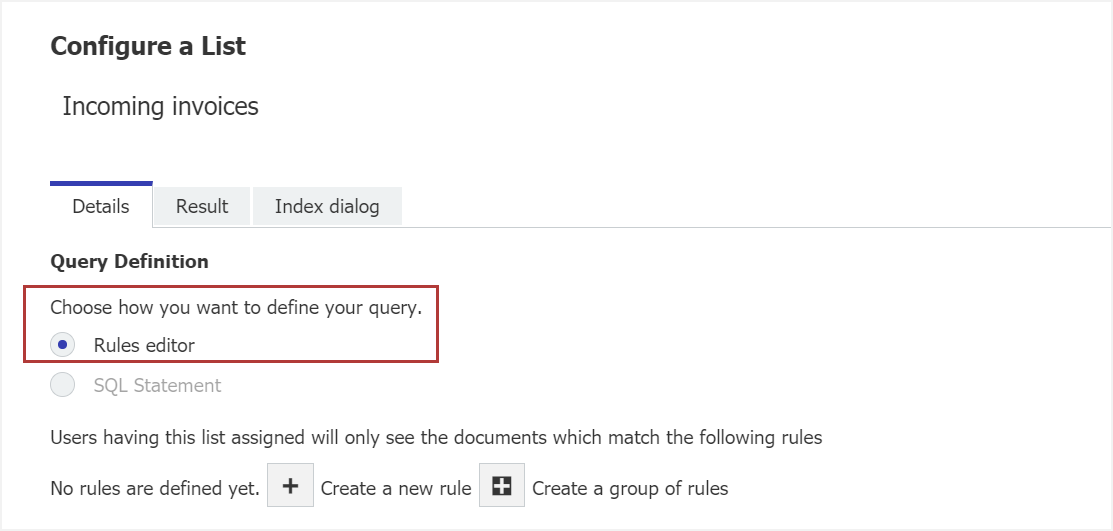
The rules editor is rooted in the database fields of a file cabinet. These include user-defined fields such as "Document Type," "Cost Center" and "Status" as well as the system fields that are automatically filled by DocuWare with technical information, like file size or storage date. This is only mentioned for the sake of completeness - the system fields are not needed for our example.
As you know, fields are filled with index information when a document is stored. Based on these index values, the archived documents can be filtered and integrated into workflows. And this also happens when configuring a list: you specify in the rules editor which index entries a document must have in order to be displayed in the list.
AND and OR or AND or OR
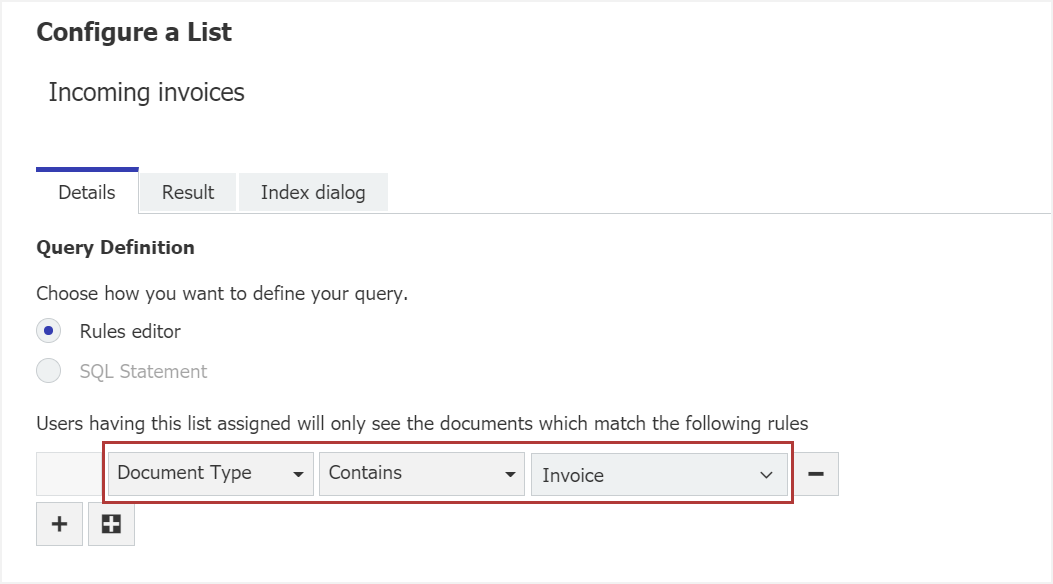
The first rule for our example is "Document type - Contains – Invoice.” You can select the document type and the fill methods like "Contains." You also choose a specific desired index entry or manually type in a value.
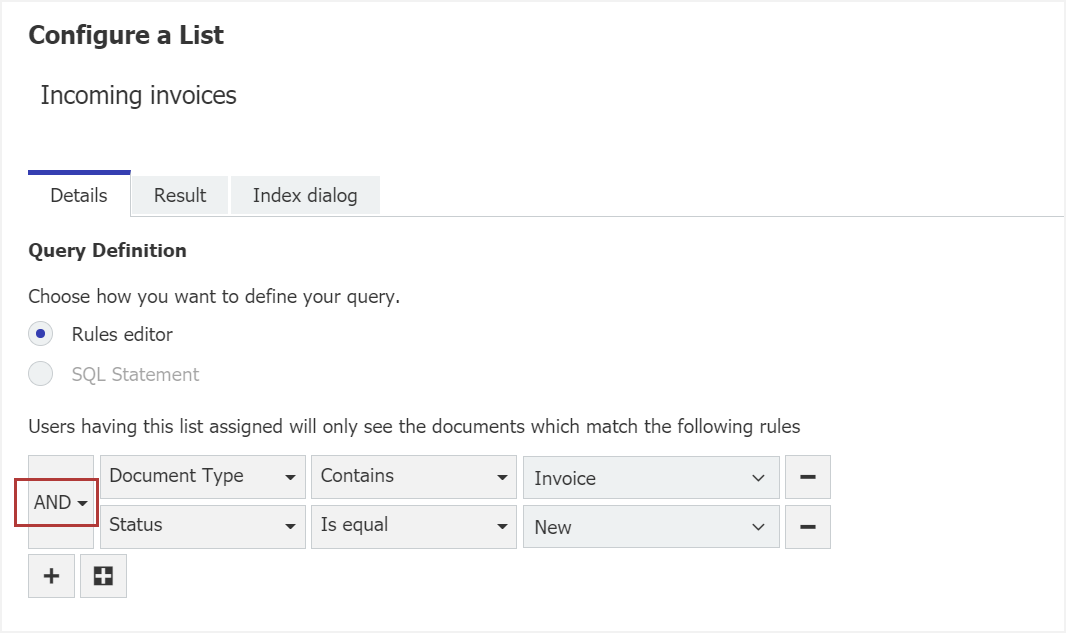
The second rule is: "Status - Is equal – New." It is important that an AND links both rules. Then only those documents are displayed for which both rules apply. If an OR links the rules, you would see both released and paid invoices in the list.
For our example as a sales manager, you don‘t want to see all new invoices from your whole company, but only those related to your team. Therefore, you further narrow down the query with a third rule about the teams' cost centers.
You create a group of rules this time because three different entries are possible for the cost center field, instead of just one as with the first two rules. To create a group of rules, click the plus sign that’s shown in a black box. Enter the first cost center, then click it again to insert a like-ordered rule for the second cost center. Repeat for the third cost center.
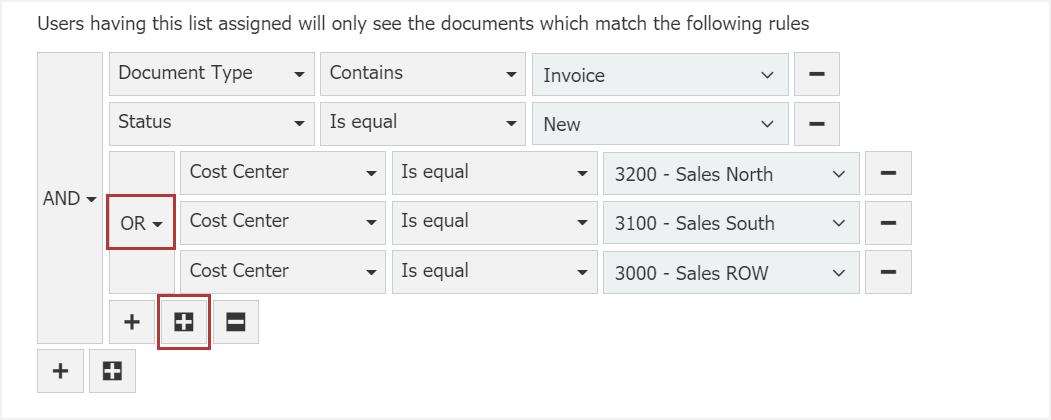
It is important to note that an OR links the cost centers. OR means that only one rule within the group must apply. With this trick you can display documents in a list that are indexed differently in one field - here in the case of the cost center field.
In the Web Client, the list then displays new documents as usual with a red icon. And when the task has been completed and the status changed to "Done," for example, the document will simply disappear from the list.
Do you want to know even more about lists? Then try this one: Tip: Save frequent searches as a list