Need some additional trays to help you prepare documents for archiving even more efficiently? Whether you set them up with or without Intelligent Indexing – trays can always be quickly added.
In DocuWare trays, you can edit, sort, and staple documents before they are stored. You will always have at least one tray as a default. But you may decide that depending on the types of documents and target file cabinets you are working with, you might want to have multiple trays for even more efficiency. Here are two examples:
Example 1: One tray with Intelligent Indexing and one without
You receive many incoming A/P invoices, but also occasionally other documents. For incoming invoices, you use a tray in which Intelligent Indexing is activated, so that invoice data is transferred directly to DocuWare and quickly stored in an invoice file cabinet. Other business documents such as contracts or customer service records need to be stored in other file cabinets. To make it easier to organize things, it’s best to skip mixing these other documents with the invoices in one tray - use a separate tray for this instead. Intelligent Indexing doesn’t need to be activated for this, since that’s best used for uniformly structured documents.
Example 2: One tray per file cabinet
If you store a lot of documents in different file cabinets, we recommend that you set up one tray per file cabinet. In this way, you can optimally prepare each type of document for archiving in their respective tray. For max efficiency, give each tray a descriptive name and select the same color as the file cabinet in the tray settings and select this file cabinet as the default destination.
How to create a tray
In the DocuWare Client, open the "Profile & Settings" section in the main menu (click on your user name) and switch to the "Document trays" tab . Here you can see all the trays that you are authorized to use. A crossed-out eye symbol on a tray means that the tray is currently not displayed in the Web Client. With a click on the eye, you can display the tray again.
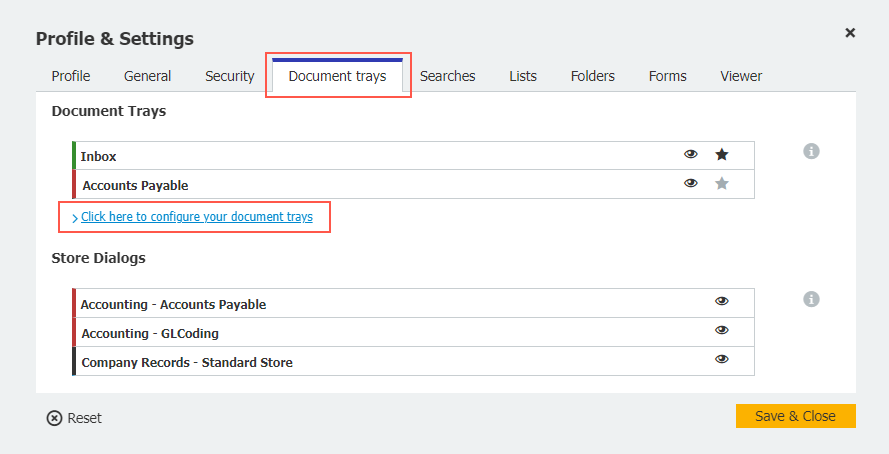 Under "Profile & Settings" you can see which trays you are authorized to use and whether you have the right to create your own trays.
If you have the link "Click here to configure your trays" in the dialog, as in the screenshot above, you can set up trays yourself. Otherwise, please contact your admin team.
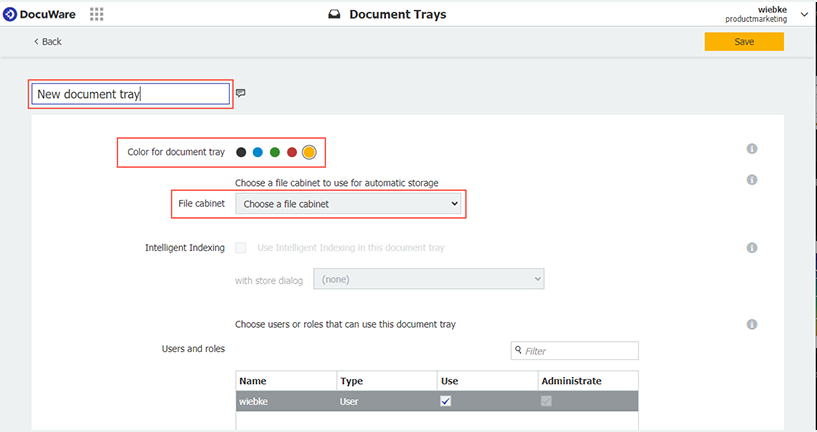
The link mentioned above will take you to the tray configuration. Essentially, there are only three settings needed for a new tray:
- Name: Give the tray a suitable name, which will be displayed in the Web Client.
- Color: If you want to prepare documents for a specific file cabinet in the basket, we recommend that you choose the color of that file cabinet. This will make your work in the Web Client clearer. Otherwise, pick whatever suits your taste.
- File cabinet: A file cabinet must always be assigned to a tray. However, if you manually store the documents from the tray, you can also choose a different file cabinet to match the respective document.
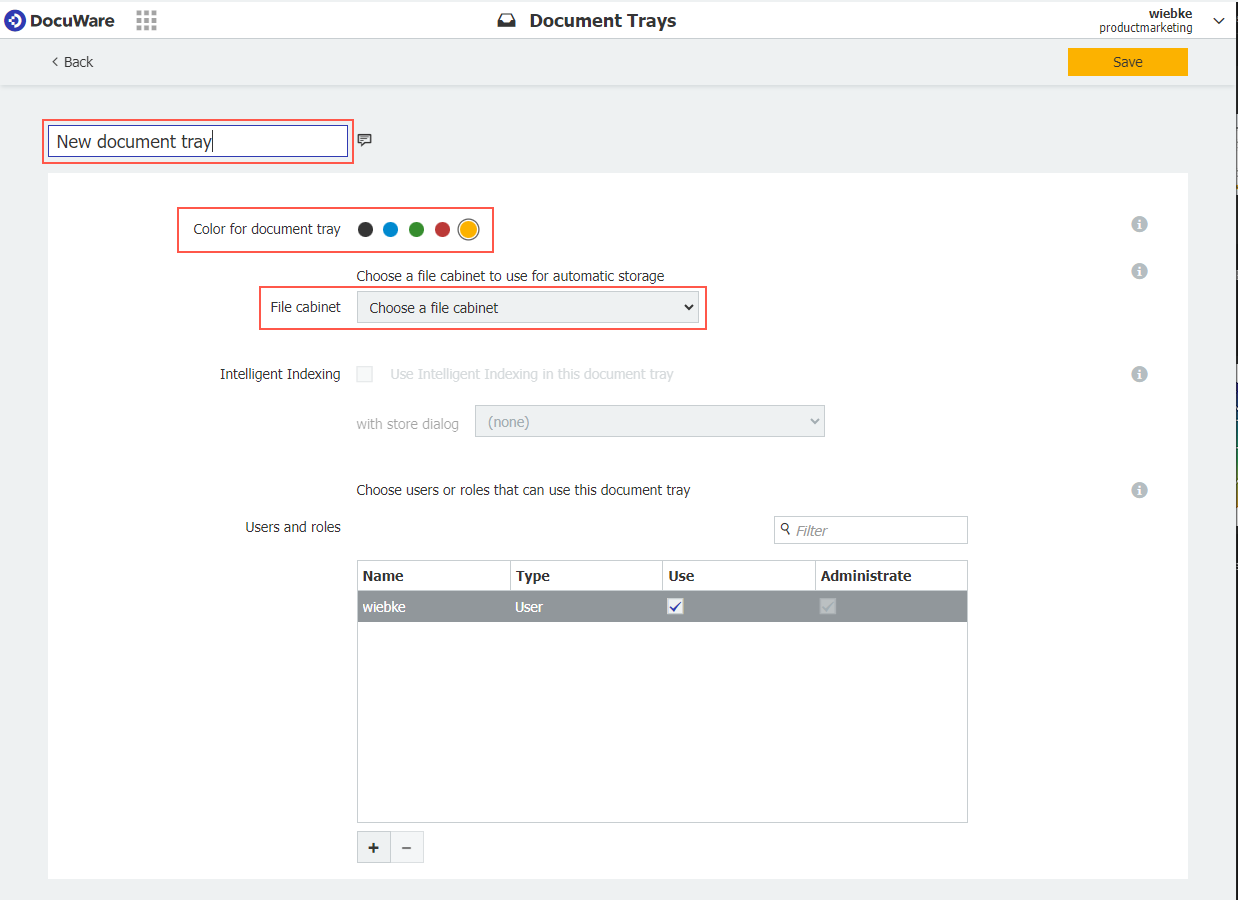 A new tray is created with only a few details
Notes on the other options:
- Intelligent Indexing can only be selected here if the tool is activated for the specified file cabinet. If necessary, please consult with your admin team.
- Rights: For the creator of a basket, usage and admin rights are directly activated. If you create as an administrator a tray for another user, give them the usage rights and deactivate them for yourself.
More about trays
• Tray features
• How do documents get into a tray?
• Tray vs. File Cabinet: What happens where?