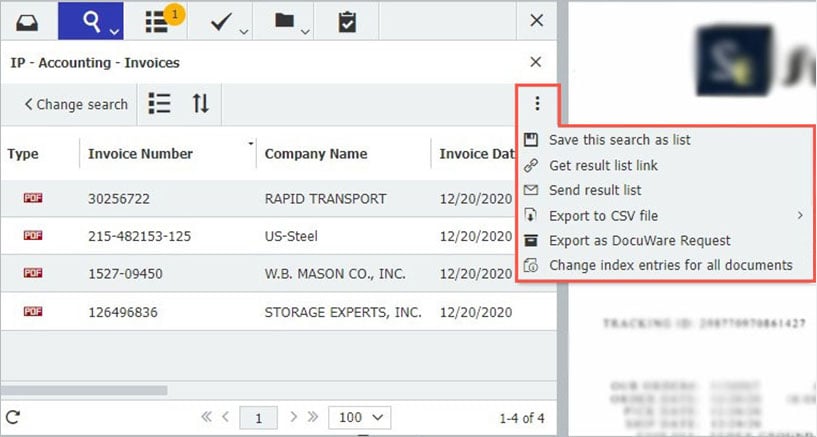
For every search, hits of found documents are displayed in a results list. This makes results lists a key part of DocuWare – and explains why it’s important to know what options are available to get the most out of them.
Tip 1: Change view
By default, results lists are displayed in table view, which contains a list of index terms for all the documents found. If your documents are visually different – and you are a more visual person – you can switch this to thumbnail, index card or text view. They all include a thumbnail view of the first page. Just give it a try!
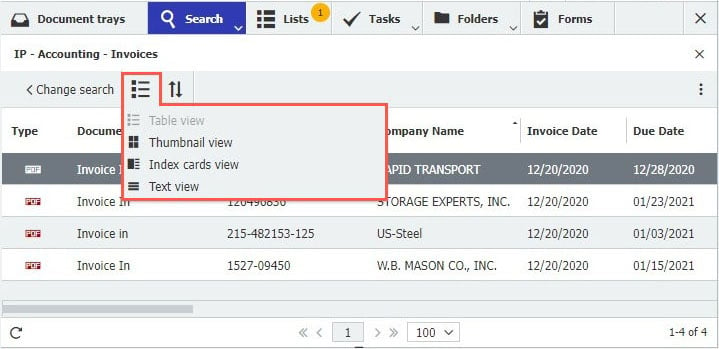
You can change the view for results lists here

Thumbnail, Index Card and Text views in comparison
Tip 2: Sort results as needed
You can easily sort the entries in the results lists to best suit your needs: by company, for example, to display documents related to one customer; by due date to see the most urgent documents at the top; or by status for a good overview of what’s in process.
Regardless of the display type, you can use the two arrows next to the view options to choose which index criteria documents should be sorted by.
In the table view, you can sort by corresponding entries simply by clicking on a column header.
Tip 3: Filter results to fit
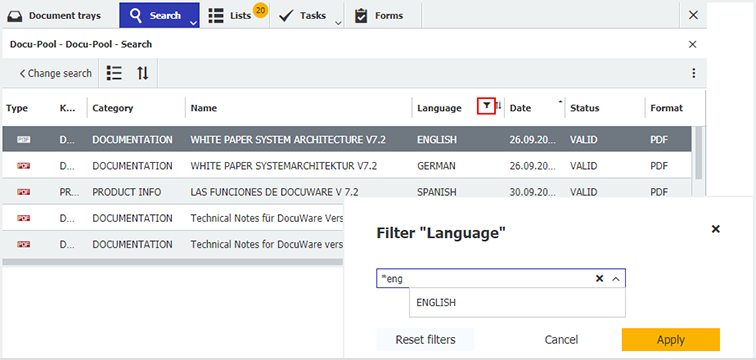
If a results list contains too many entries, you can filter by specific values to narrow down the results without having to switch back and start again with a search dialog.
Here’s how: As soon as you click on a column header of a field in table view, a filter icon will be displayed. Click on it to enter your additional filter. This will provide the usual options as for entering search terms.
These filter options have been available for text fields since DocuWare Version 7.3 and for date/number ranges since DocuWare Version 7.4.
Tip 4: To see all your functions
Results lists contain a lot of features, some of them refer to single or even several documents, others to a whole result list.
Right-click on a selected document to open the context menu. Here you‘ll find some of the basic features needed for document processing: send, change index entries, retrieve link to document, delete, send request and much more. Depending on rights and licenses, this may vary.
By clicking on the 3 dots, you can also open the menu with features that relate to the whole result list, for example, Save search as list.
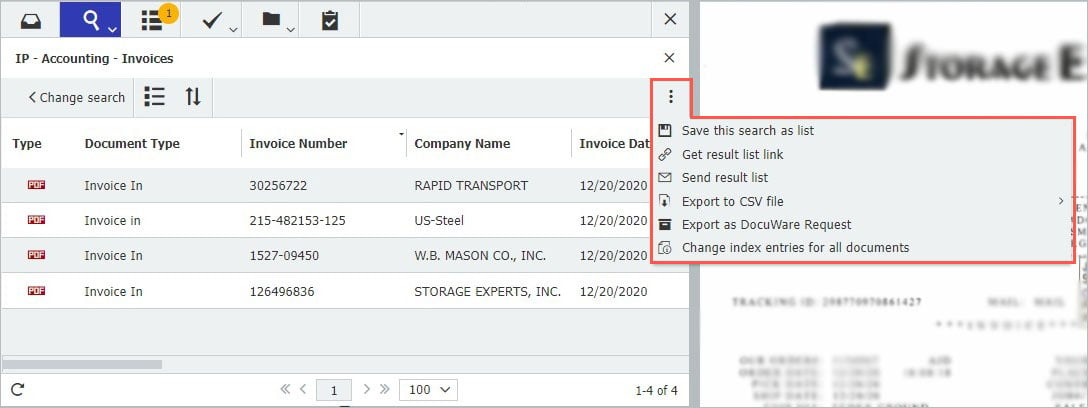
Options menu with features that apply to an entire results list
Tip 5: Reorder and hide columns (for more seasoned users)
Do your results lists contain more columns than needed or appear in the right order for your work? Since everyone has different tasks (or preferences), results lists can be further customized. With a few clicks, you can optimize your work interface and keep only the most necessary things directly in view.
Here’s how: Call up Profile & Settings in the DocuWare Client main menu, click on the Searches tab and scroll down to Results Lists. Click on the plus icon in front of the desired results list to display the included fields/columns. Hide columns you don't need by clicking on the eye. Use drag and drop to change the order of the columns.
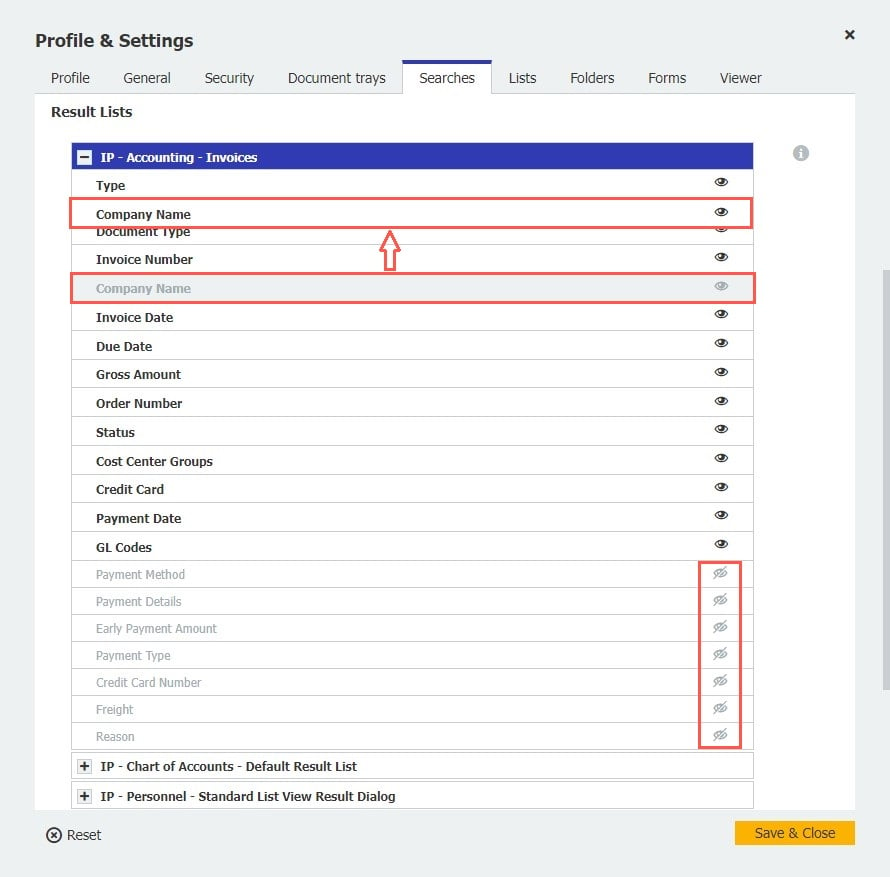
Change the order of the fields by drag & drop. Hide and show fields by clicking on the eye symbol.
Tip 6: Define results list features (for file cabinet administrators)
For each results list, file cabinet administrators can define exactly which functions are available to users. In addition, you can also show the two or three most frequently used features for direct access as a button in the upper area of a results list. For different teams who have different requirements, you can create the optimal user interface for each, and serve up results with an optimized view. Here’s how.
P.S.: Results list features can of course only be used within the scope of overall file cabinet rights. For example, if a results list contains Delete as a function, only users with Delete rights can make use of it.

