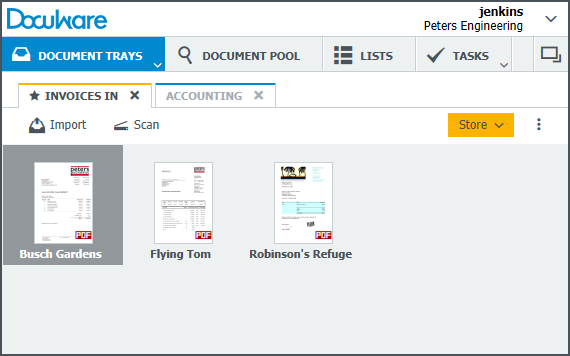
 Just like the old inbox on your desk - but without the mess and overflow – documents can be processed and sorted in a digital basket. Are you familiar with all the handy features that come with a DocuWare basket?
Here’s a quick DocuWare Basket 101.
Creating New Baskets
You are probably using at least one basket. Typically, this was set up centrally. But if you’d like to have more baskets, they can be easily configured:
1. Open Configurations in the main menu of your DocuWare Client.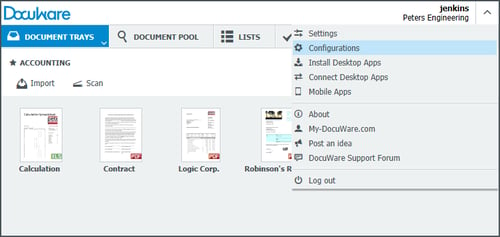
2. Go to "Document Trays" in the configuration overview then start to create your new basket by clicking on the green plus sign at the top left.
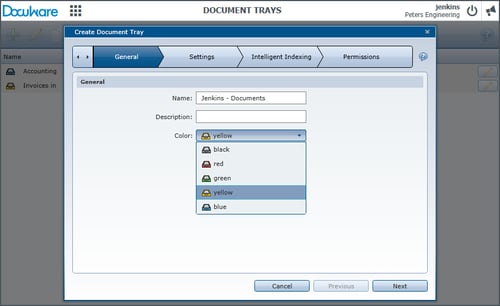
3. Now just four more steps are necessary. In "General" enter a name for the basket and select a color. In "Settings," you can limit document capacity and if you’d like to automatically store documents out of the basket, you can choose a file cabinet as a destination.
If you don't need this, you can skip this step. As another option, you can enable the Intelligent Indexing Service for your new basket.In the last step, you can provide the right to yourself to use the basket as well as grant rights to other colleagues.
Working with Multiple Baskets
Your new basket now shows up in the dropdown menu of the Document Trays-index-tab in your DocuWare Client.
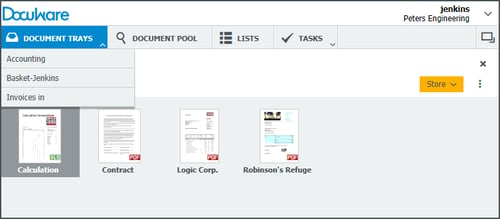
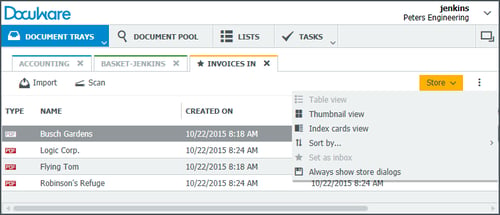
In this example, three baskets are now available. Clicking them opens a new tab for each basket:
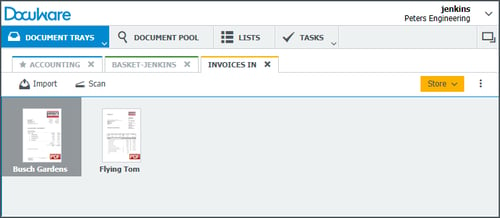
In this way, multiple baskets can be open at the same time and you can switch back and forth between baskets.
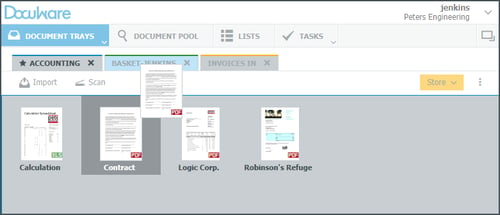
Documents can be dragged and dropped from one basket into another: just grab the document and drag it to the appropriate tab.
With an Asterisk: Standard Inbox
One of your baskets always appears with an asterisk. This means: documents will end up here by default (in this inbox) after scanning or printing – unless something was changed in the configuration and a different target was set up.
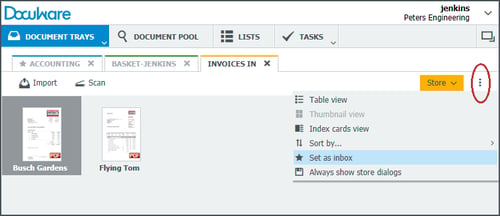
If you’d like to identify a different basket than the inbox, simply open your Basket Options and click "Set as inbox".
Changing Document View
A big advantage of digital baskets is being able to view lots of documents in one spot. But if too many documents are shown in the basket, it might be helpful to change the view. This is also easily managed in Basket Options: for example, switch to miniature view or a table view or sort documents as needed.
Editing Documents: Stapling, Stamps & Co.
Editing documents in the basket can be handled via context menu (right mouse click on document) or via toolbar in the Viewer.
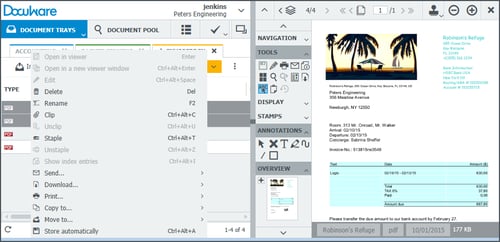
In the context menu, there are staples and paper clips that can be used to combine two marked documents. In the viewer, highlights, stamps or annotations can also be added to a document.
With a click on the  the document can be opened directly in the original program for further editing.
Of course it’s also possible to email or print documents straight out of a basket.

