It’s easy to customize store/search masks, lists and index dialogs. For example, you can configure a store dialog to accommodate the languages spoken in a company’s different locations - in just three steps.
You can change index dialogs – such as those used to store, search or create lists – without having to create new fields for a file cabinet. The reason this works is that DocuWare distinguishes between database fields and dialog boxes. Database fields are always the same in the file cabinet, while dialog boxes can be more easily customized for storage, search, etc.
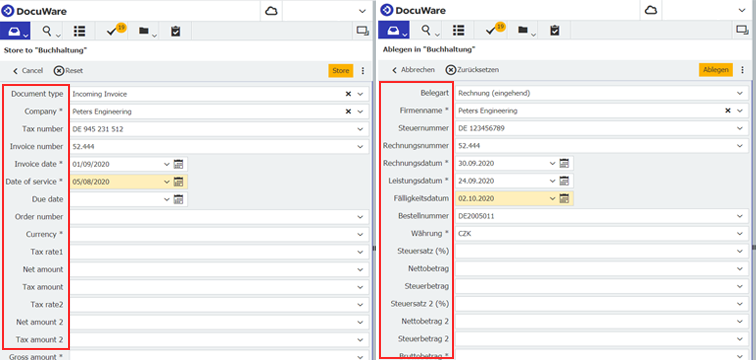
For example, employees from international branches are all set up to use the same file cabinet for a company-wide invoice workflow. Three steps are all that’s needed to adapt and translate the store dialog and thus make it easier for employees in international branches to access it: just copy the index dialog, re-label the index fields and assign the modified dialog to the employees who need it.
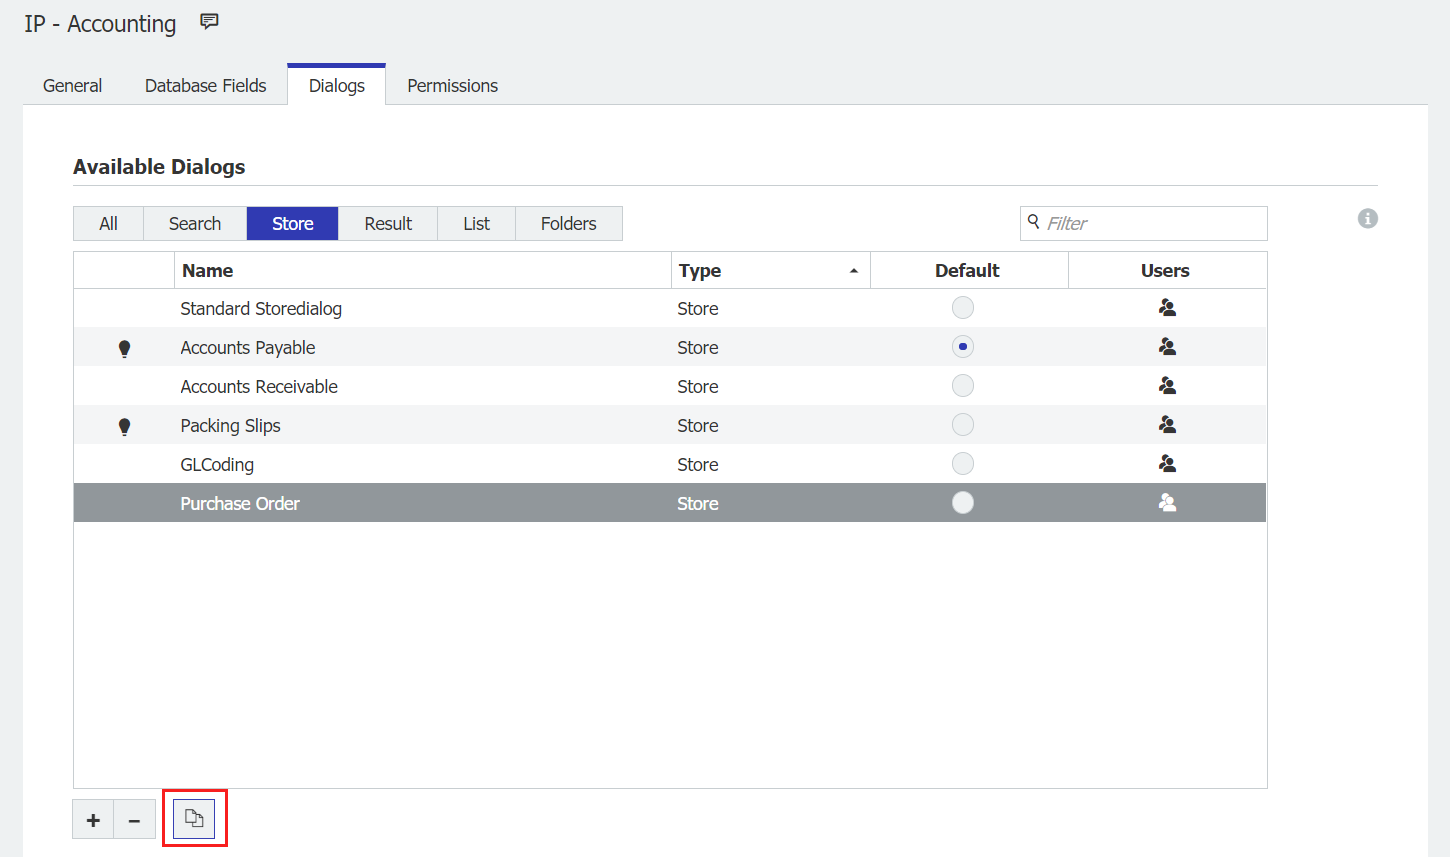
1. Copy index dialogIn DocuWare Configuration, open the file cabinet in which you want to change the store dialog. Find the store dialog in the "Dialogs" area and copy it – here, in our example, the one for "Incoming Invoices":

2. Change index dialog
Open the copied dialog. Enter the German term as the field name for the dialog if the file is to be made accessible in Germany. The database name remains the same – only the label in the dialog is changed.

3. Assign store dialog
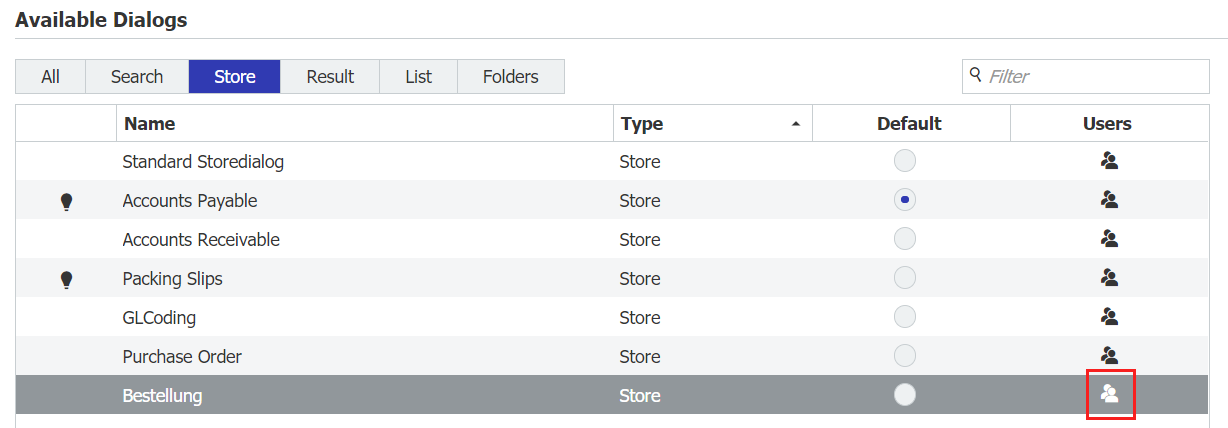
Back in the dialog overview, click on the user symbol to assign the storage dialog to a specific employee group or role.

Repeat the same procedure to set things up for other branch languages. DocuWare supports 18 languages, so the language of the Web Client can also be easily changed (in the main menu under Profiles & Settings > General)
Keep search dialog organized
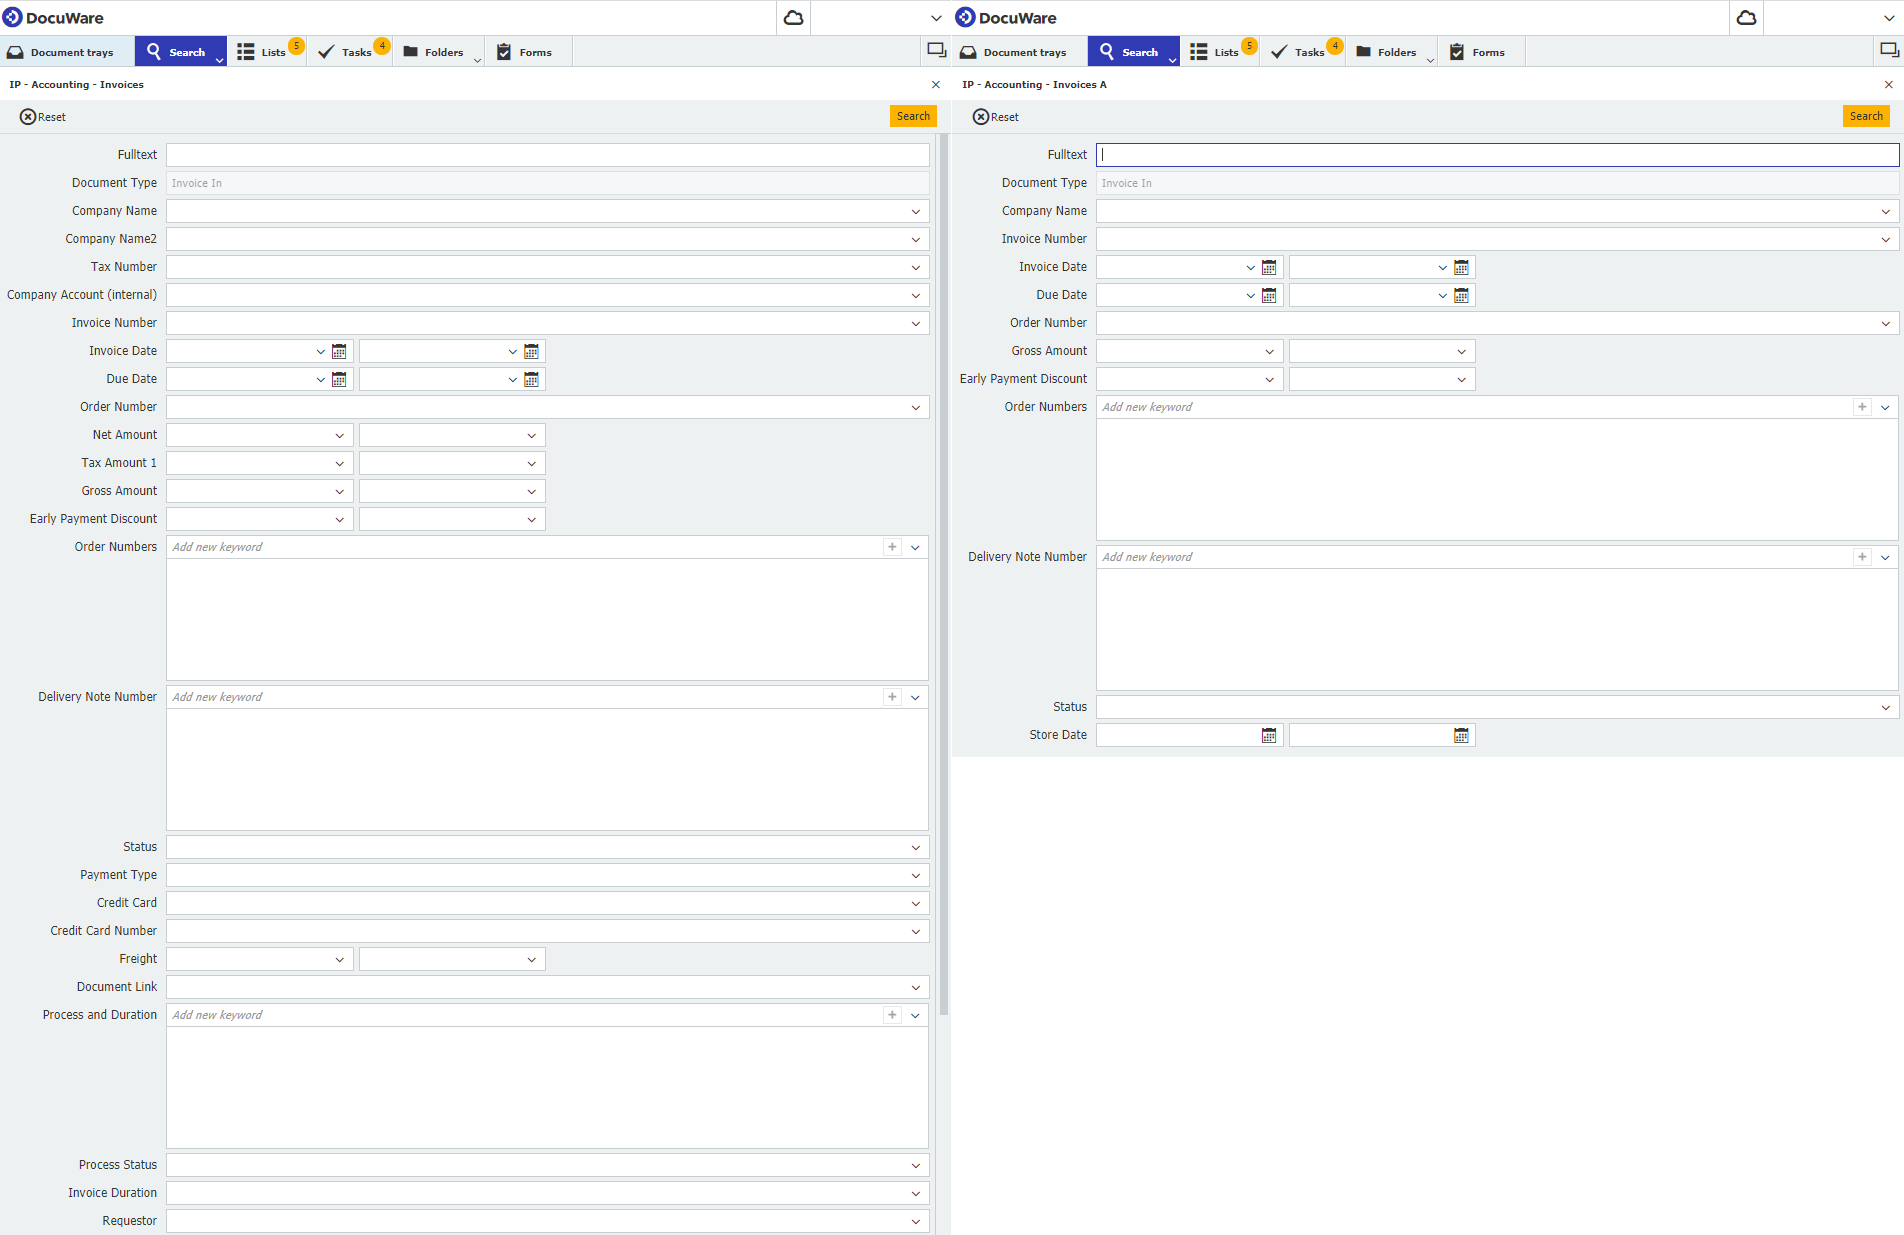
Here’s another common example: Marketing or HR employees prefer a few, clearly arranged input fields for searching invoices rather than the detailed search dialog required by the Accounting department.
Copy the dialog and choose the desired fields – you can then make unnecessary ones invisible by clicking on the eye symbol.
The fields are not deleted but are no longer visible in the copied dialog. The third step is to reassign this search dialog to specific colleagues.

Tip: If the new dialog is not displayed in the Web Client, activate it in the main menu under Profiles & Settings.

